Quantcast
Viewing all 231 articles
Browse latest View live

Sorta Fall Sewing with Nettie

Back in June I mentioned that Nettie was going to become a wardrobe staple. Boy did it ever! If I was the sort of person that took stats of daily wear and created a pie chart, then it might look something like this.*
* All data has been made up. Also goal for next summer - more lobsters.

I probably wear a Nettie about 4 times a week, which is why they got added to the Fall Essentials Sewing plan. Yeah baby, I'm gonna milk this cow until she runs dry. Or until I'm freezing and nothing but wrapping myself in yards of wool will do. Wool mummy, grrrr!

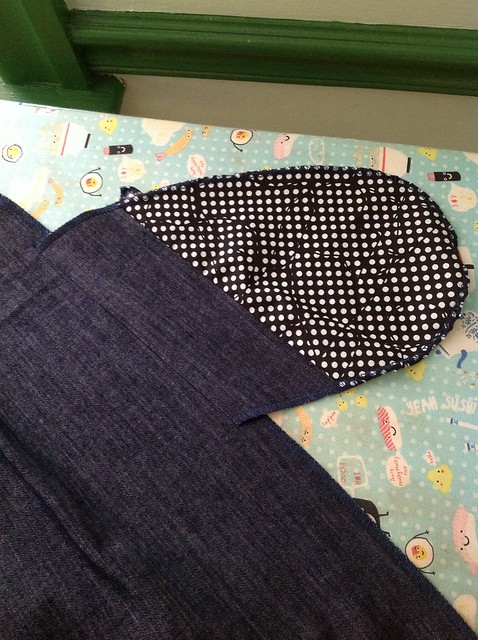
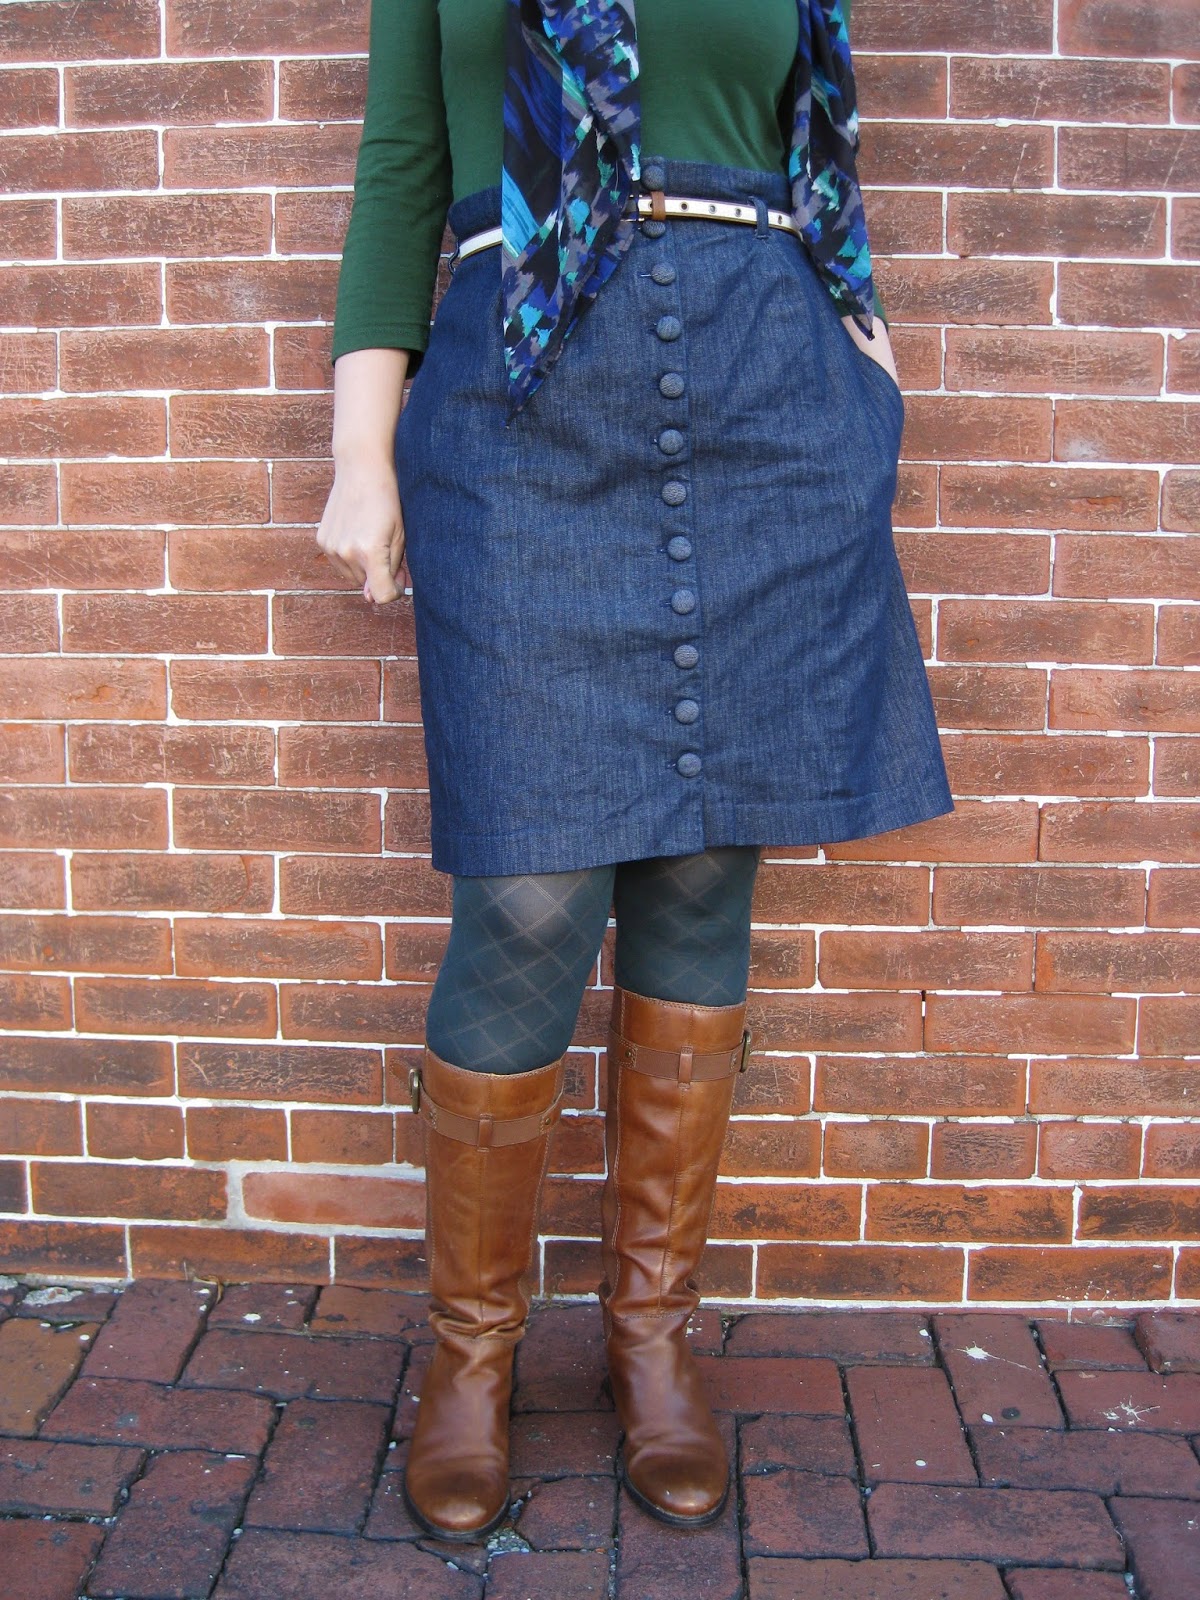
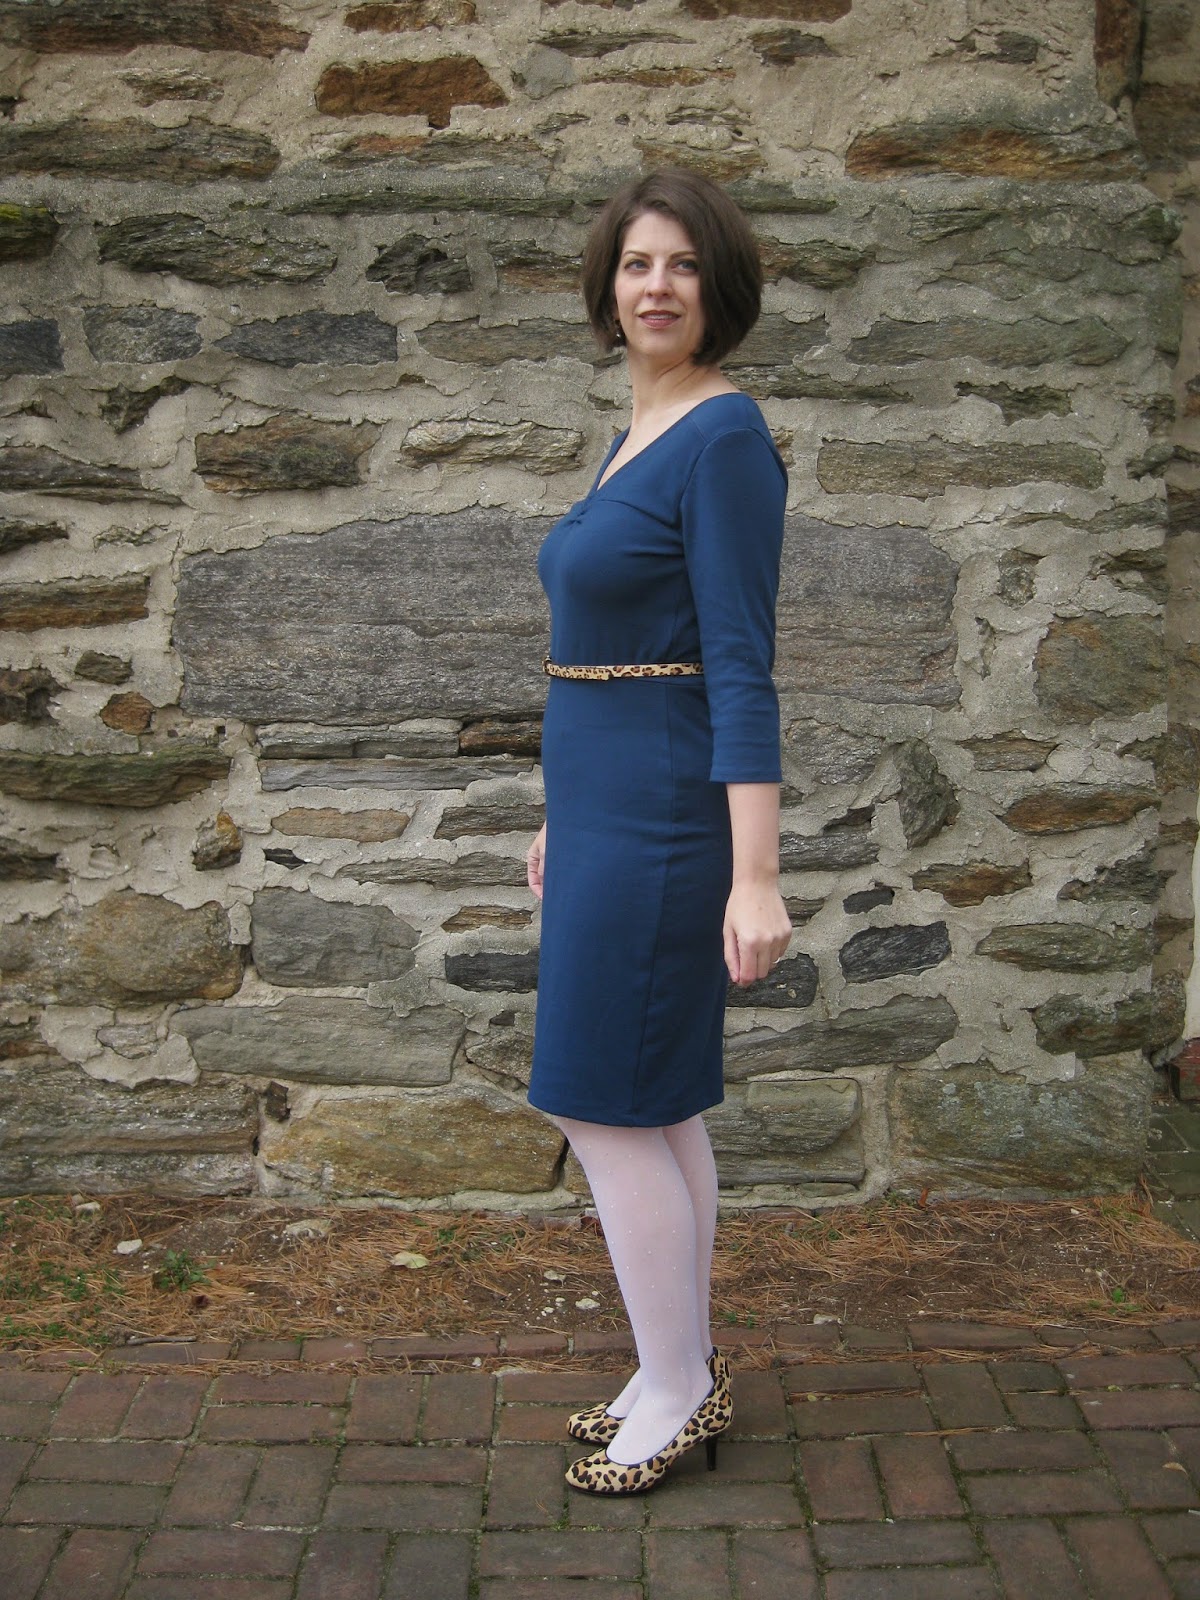
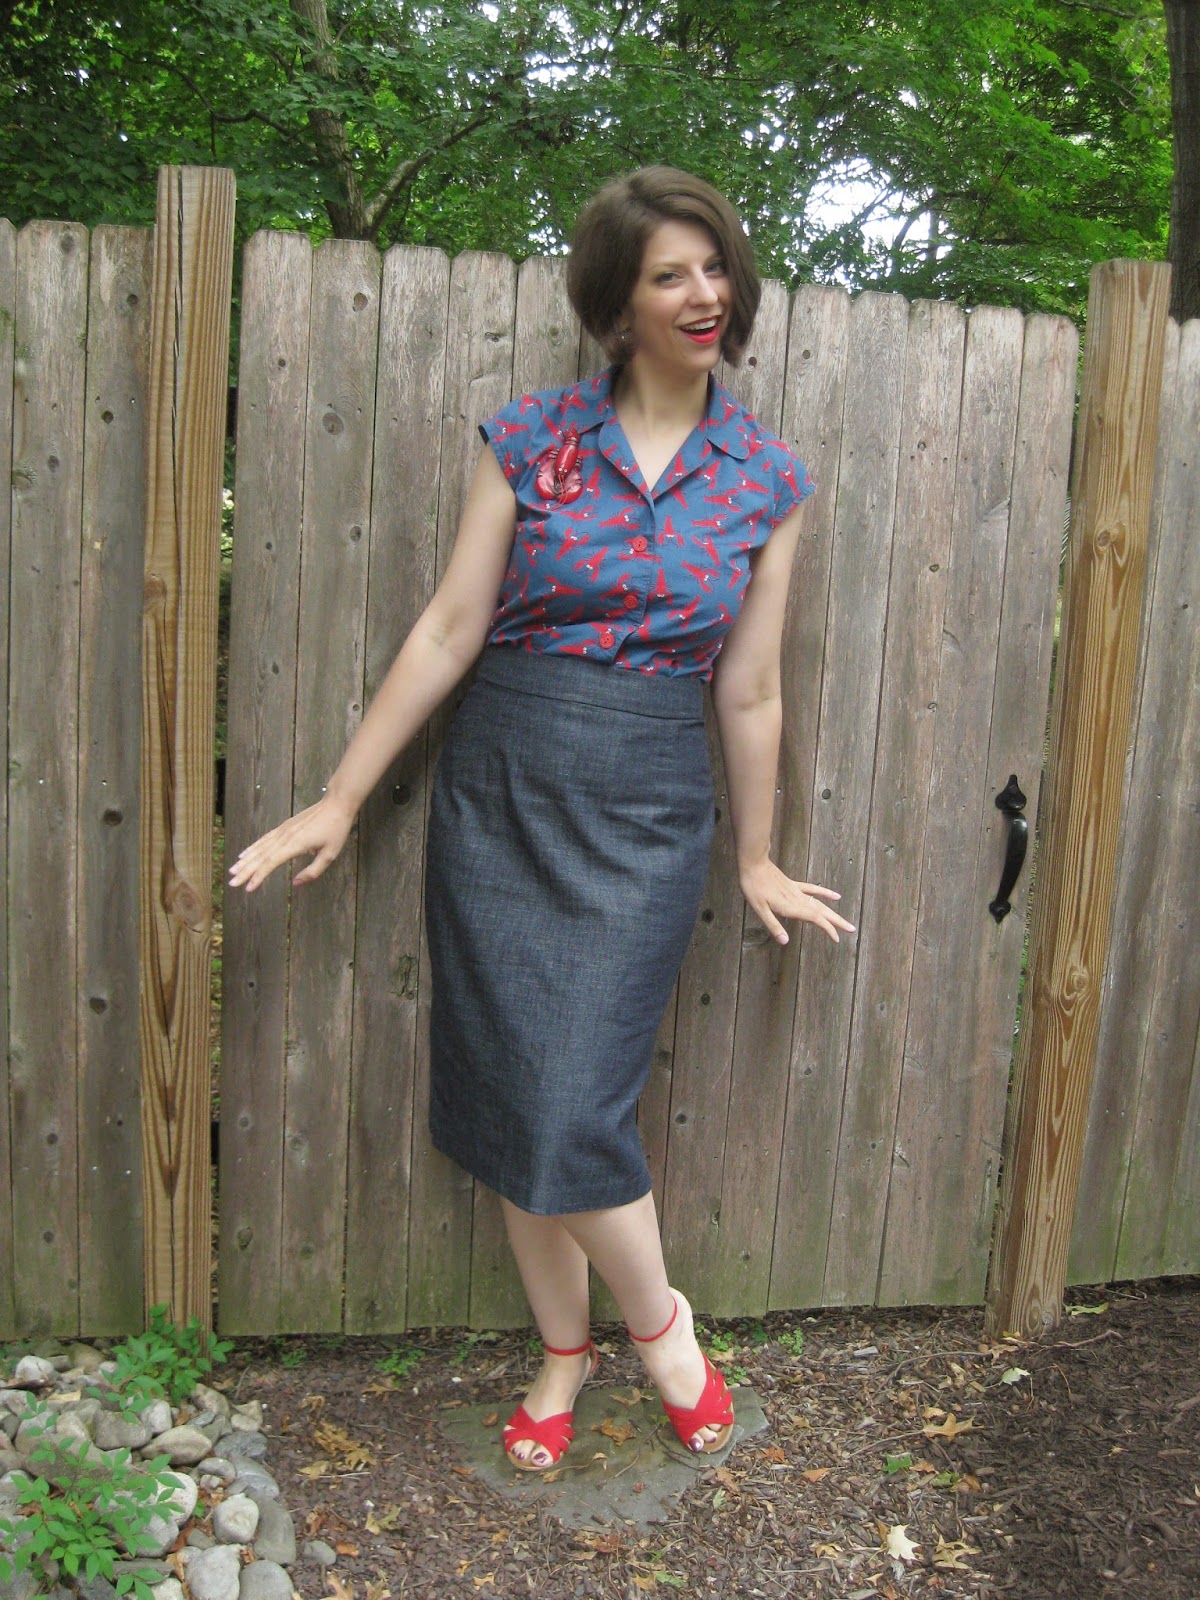
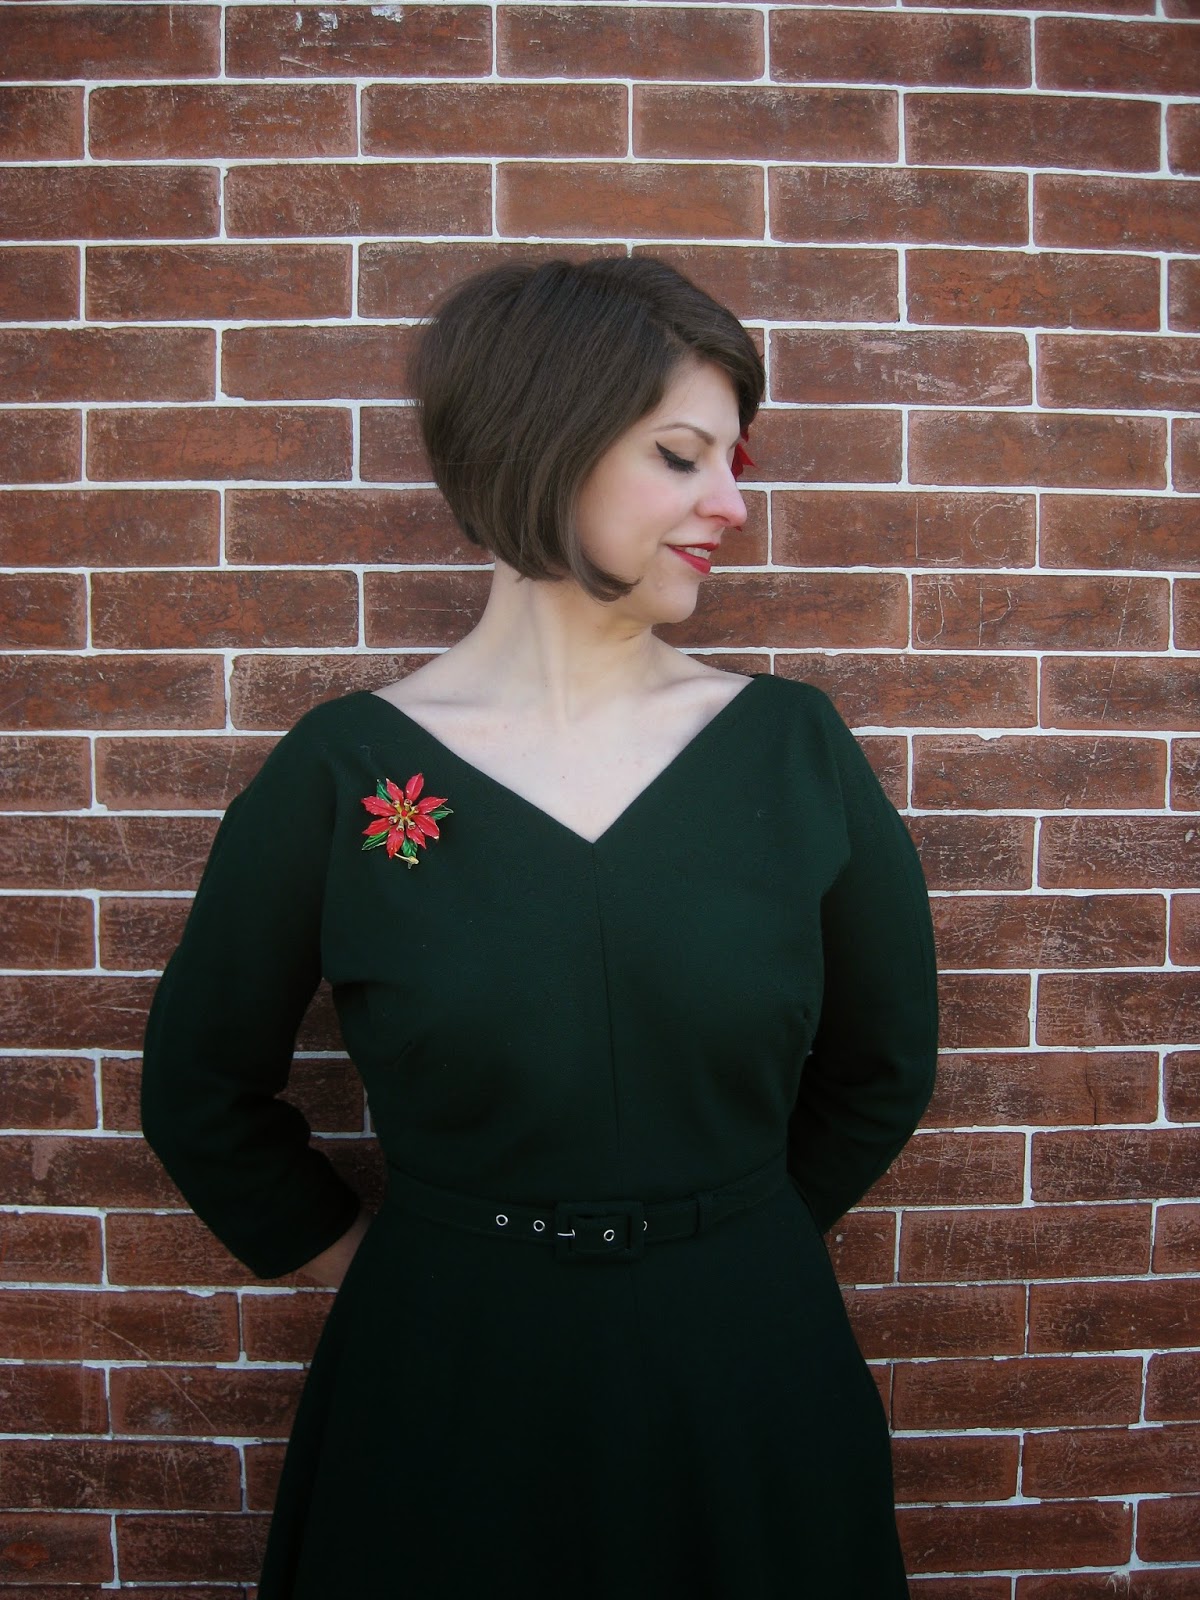
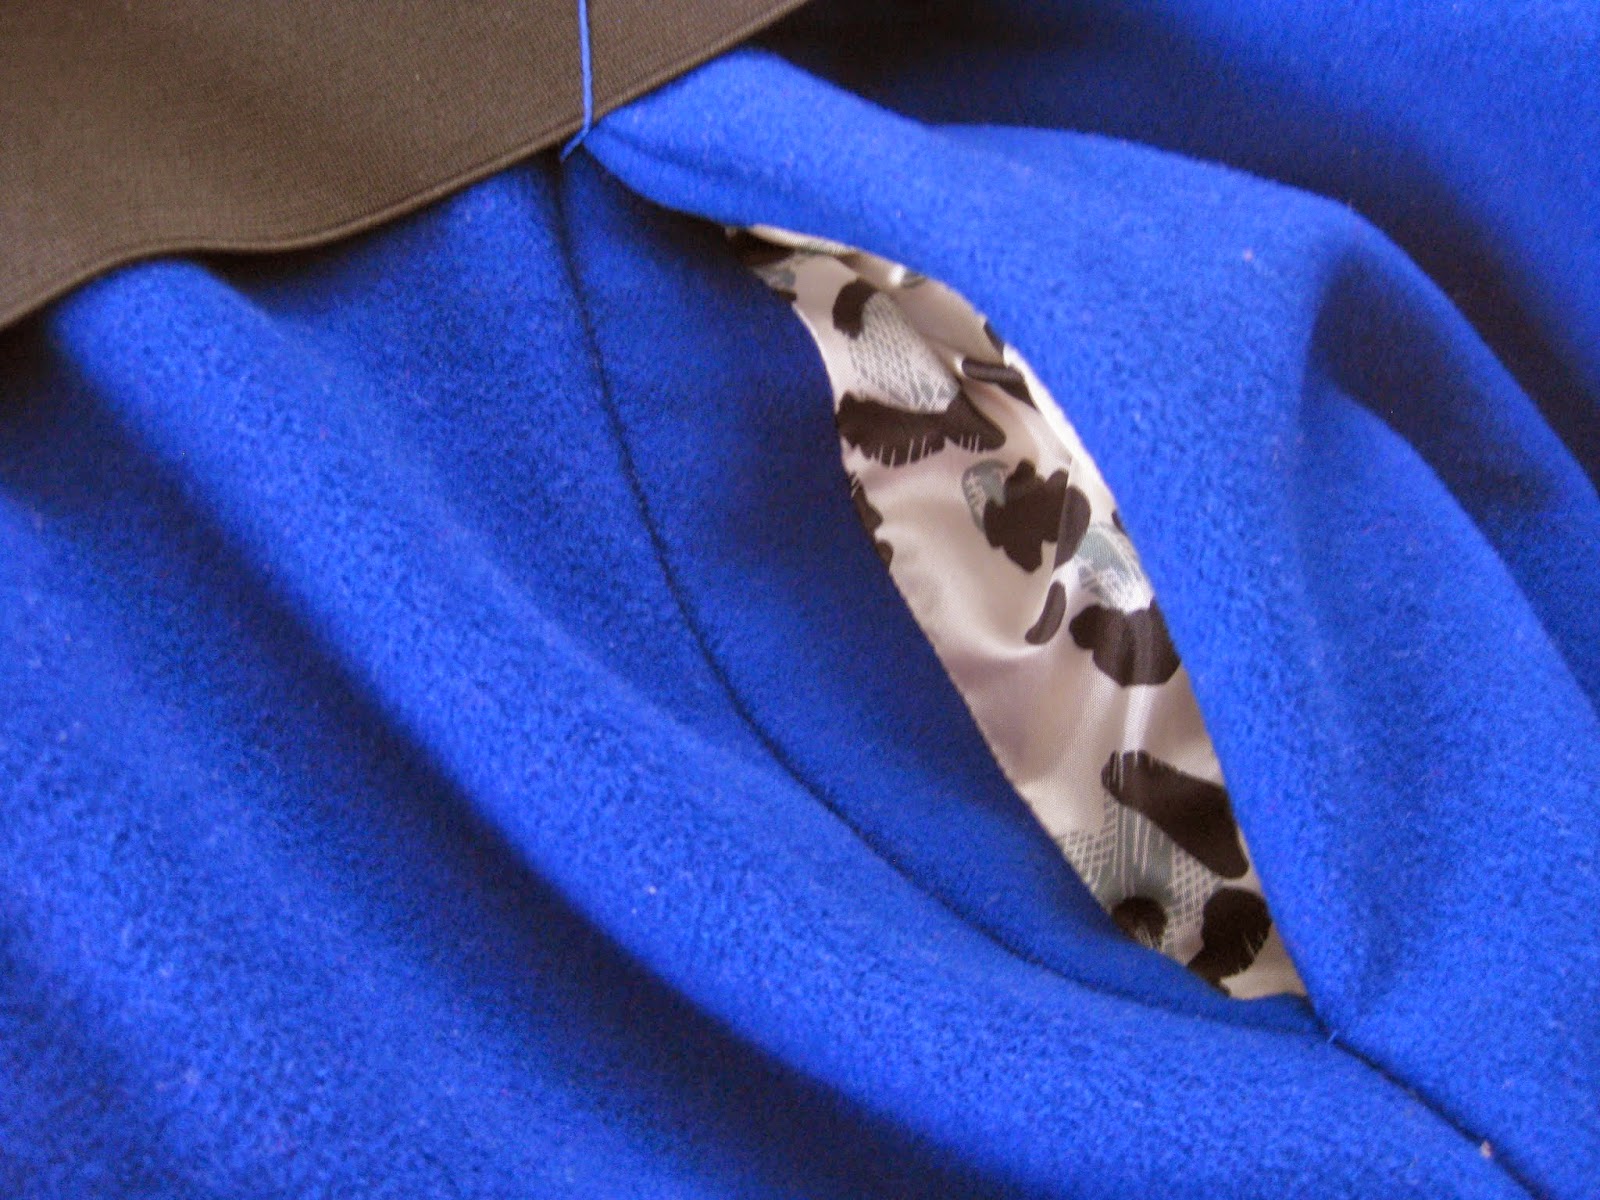
Despite the rampant germ sharing in the house, and I was able to bang out a Fall-ish version out of some stashed soy/cotton jersey. Here it is paired with an Odette skirt and a snazzy peach brooch from Luxulite.
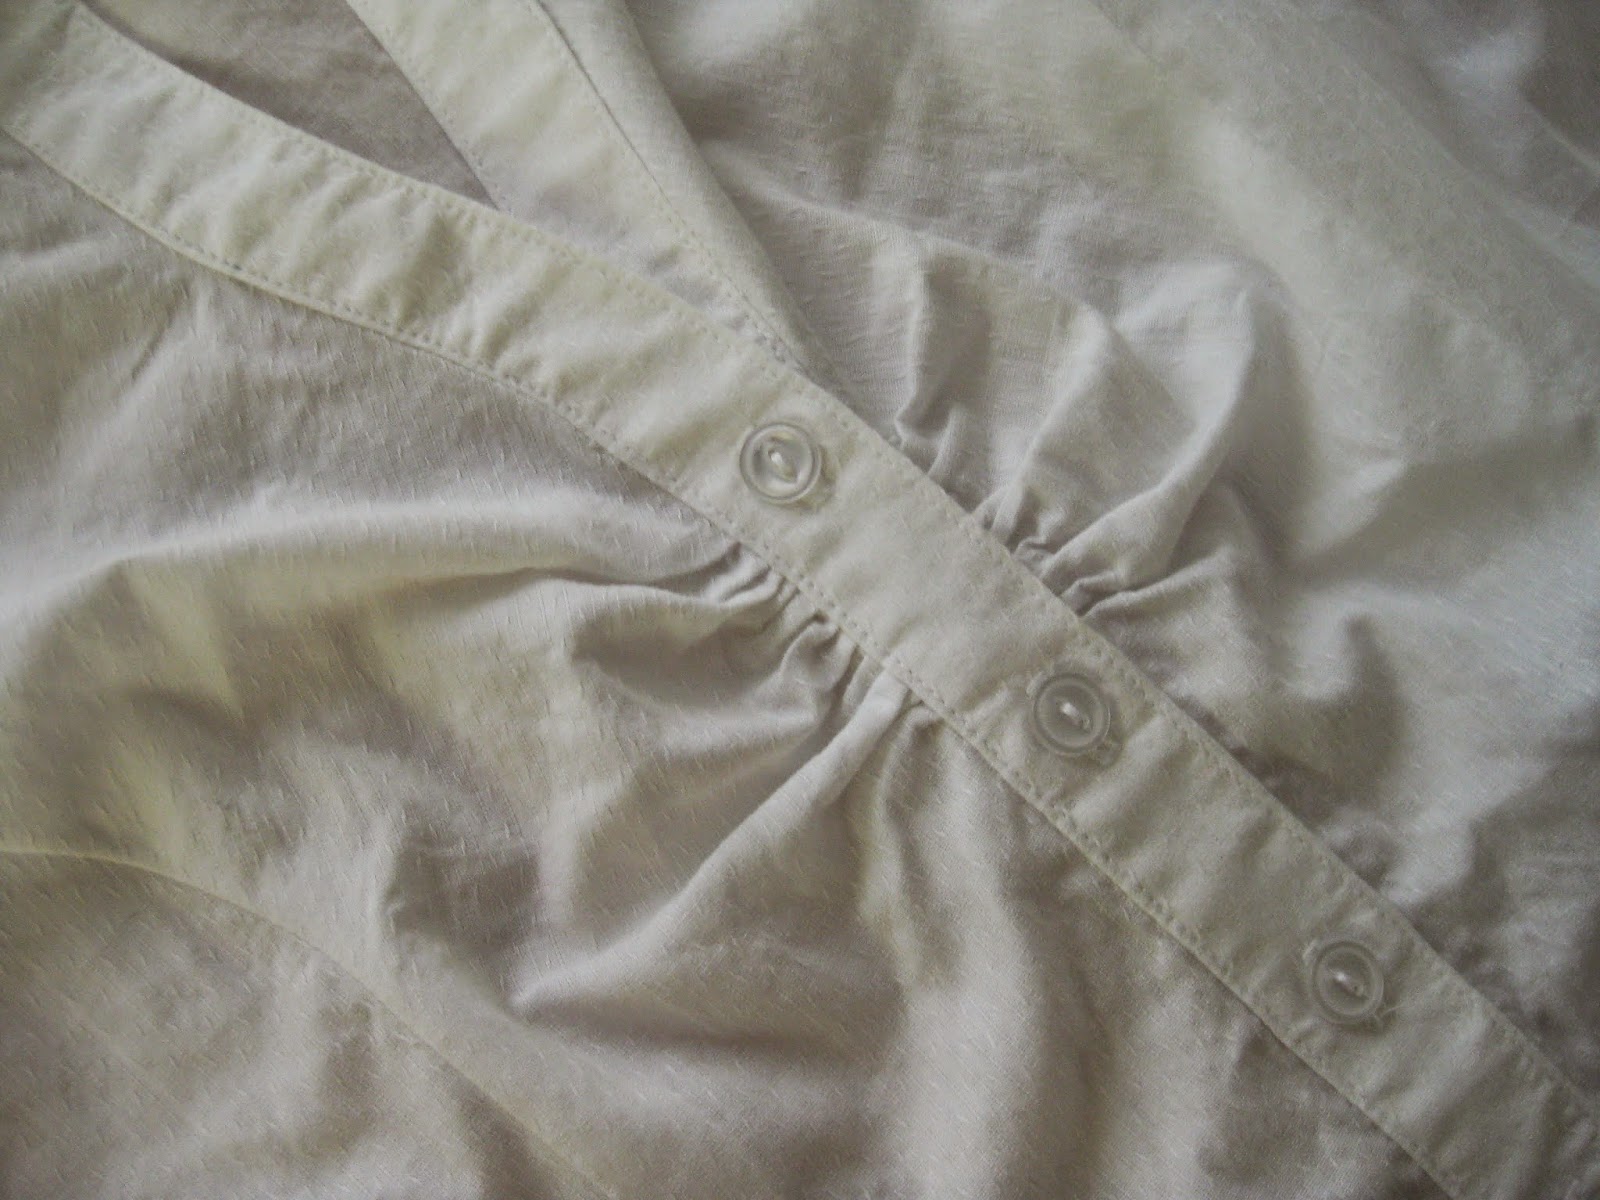
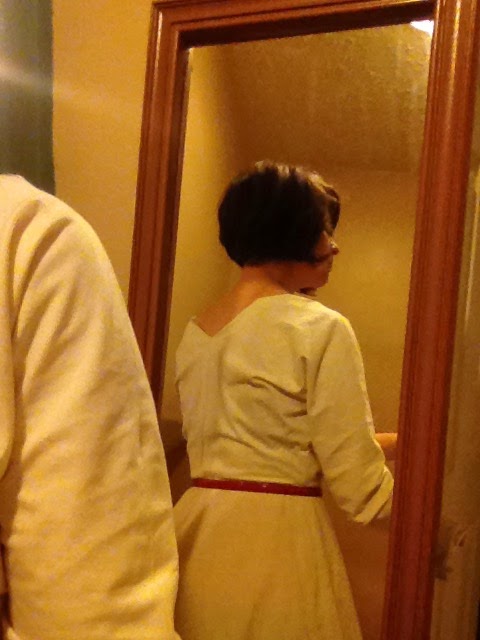
If you want more info about the skirt, click on through to the Bluegingerdoll blog where I talk about waistband options.  Over here it's all about the Nettie.  Now I call this version Fall-ish because I went for the medium scoop back. Not exactly cold weather wear, but my husband was thrilled.
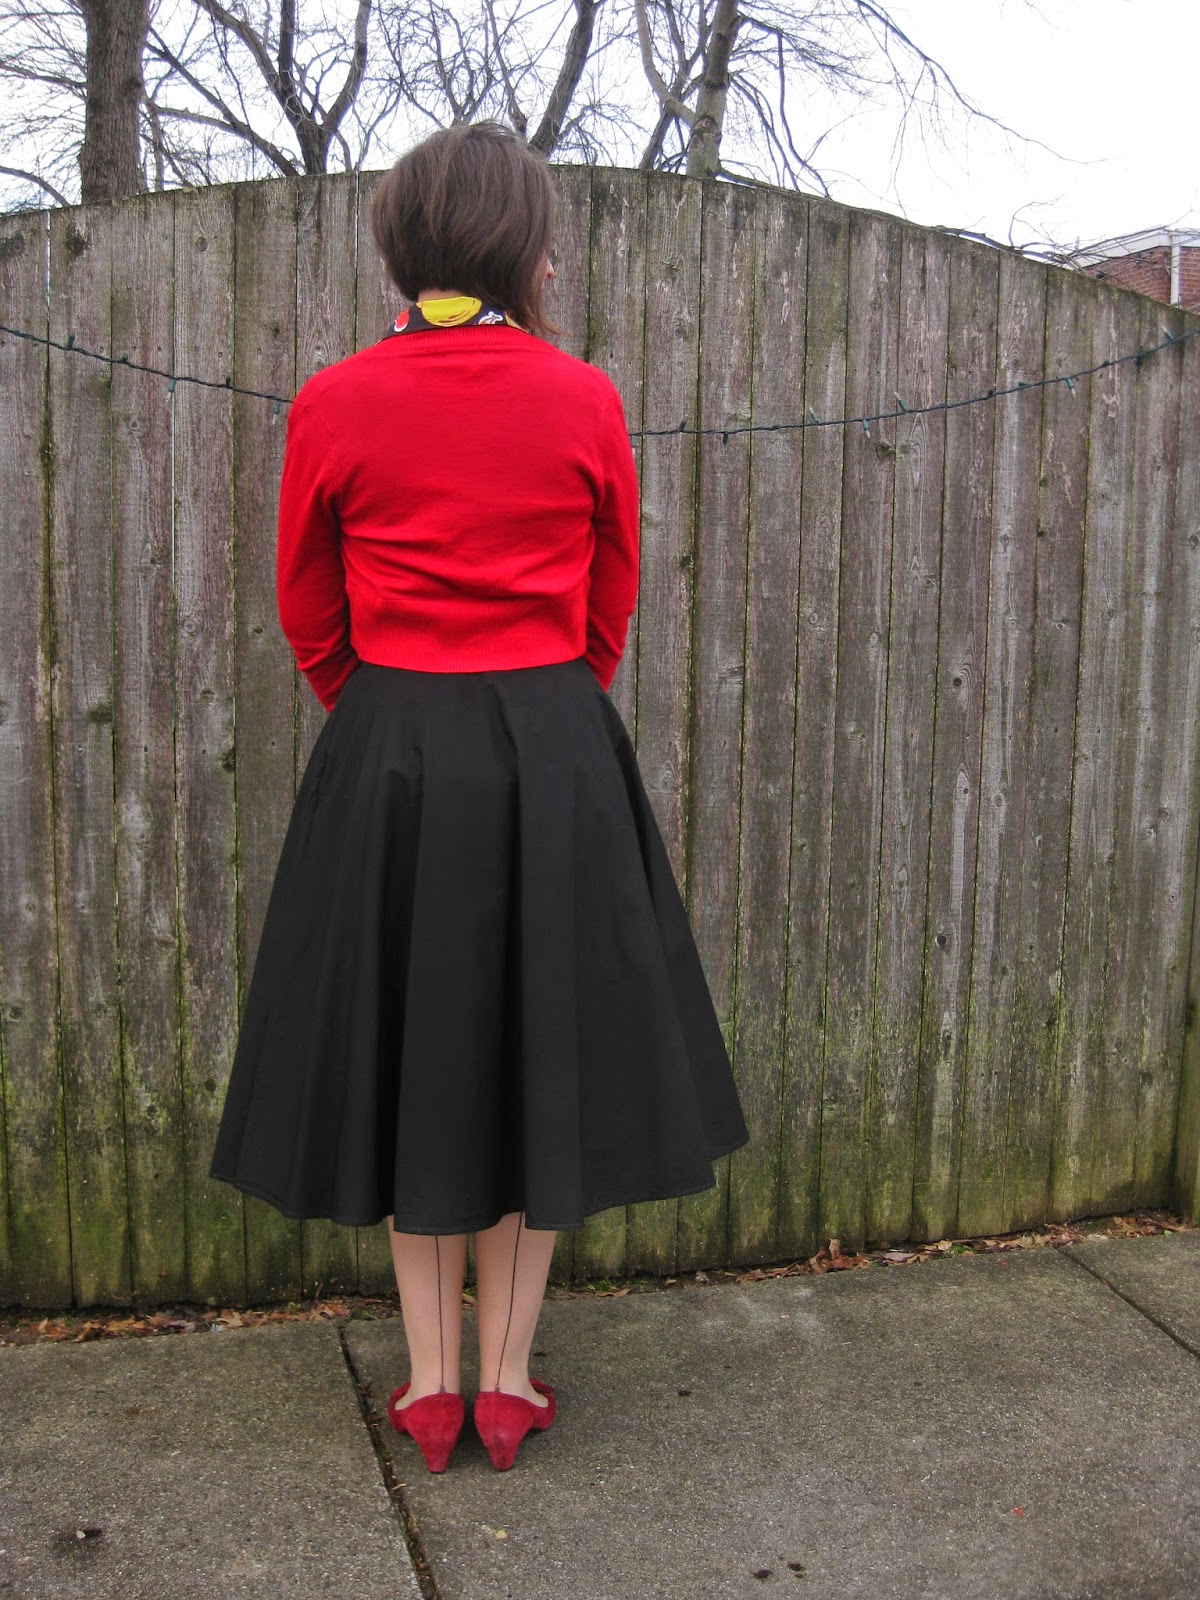
I like this view a lot too, it's sexy without being overly so.  No one is going to point and gasp, "My Stars!" at your exposed scapula.  At least they won't until I made it "a thing."

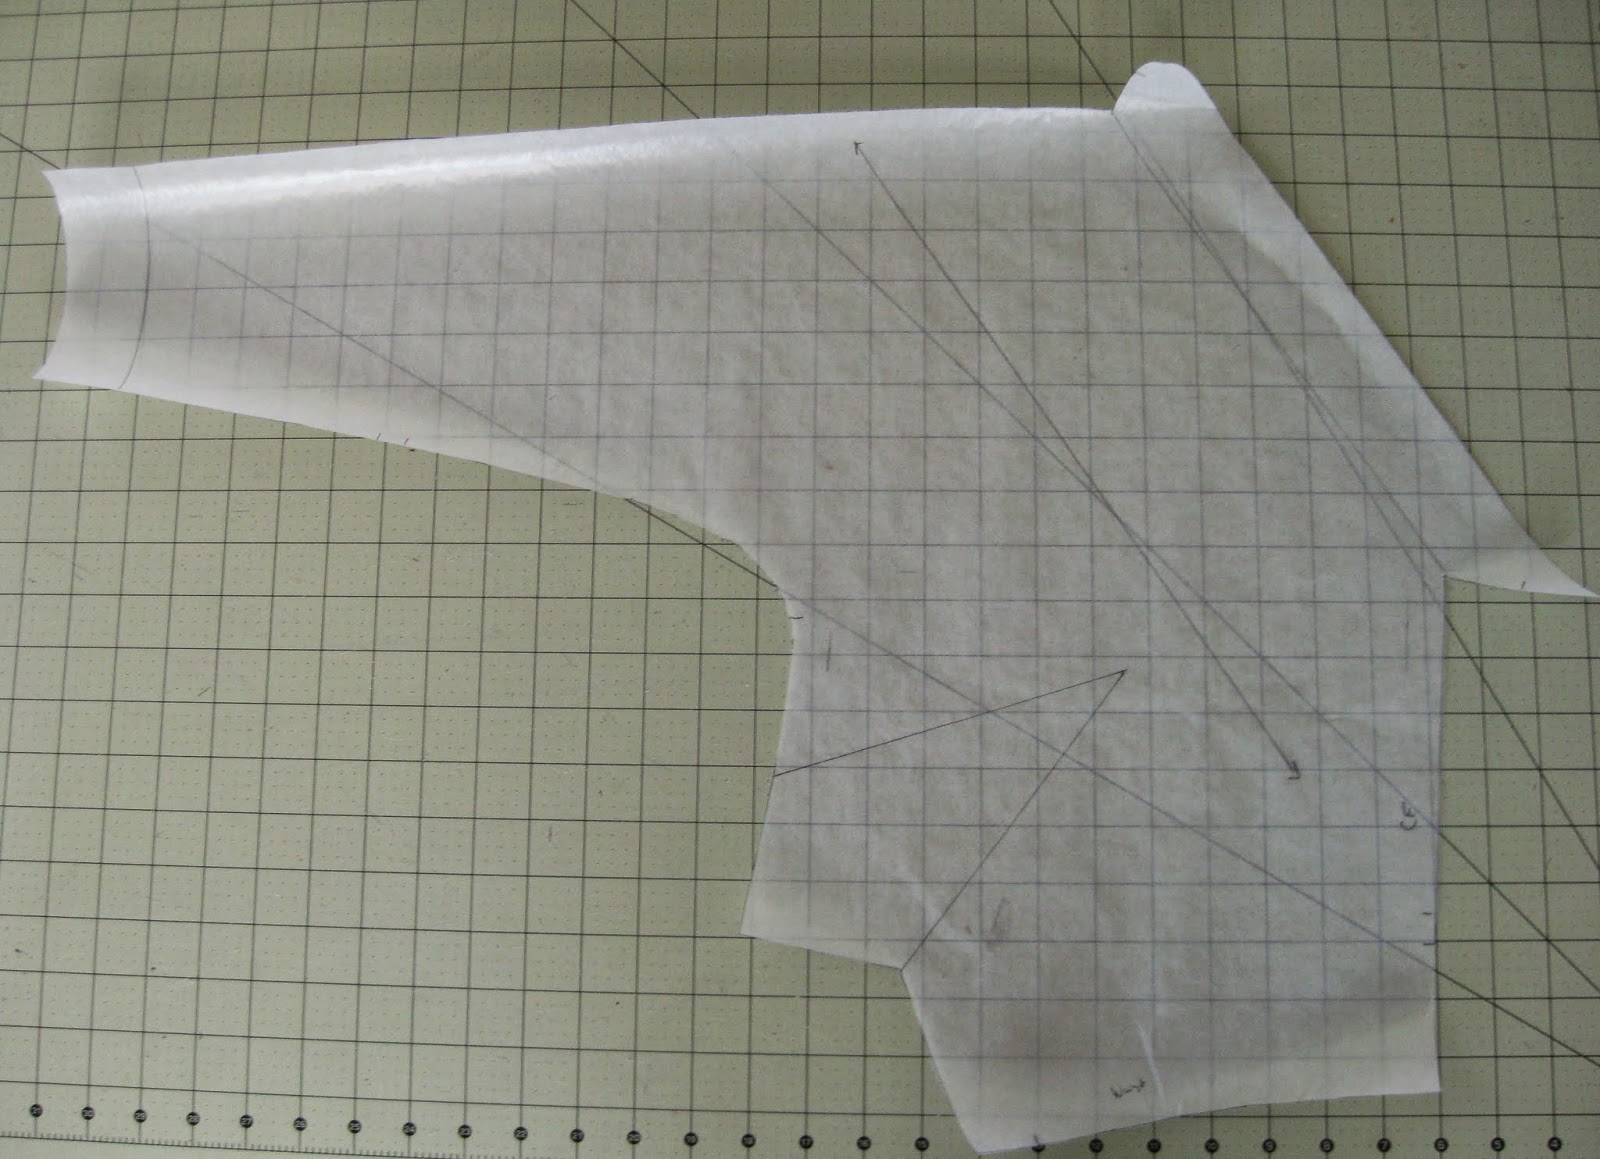
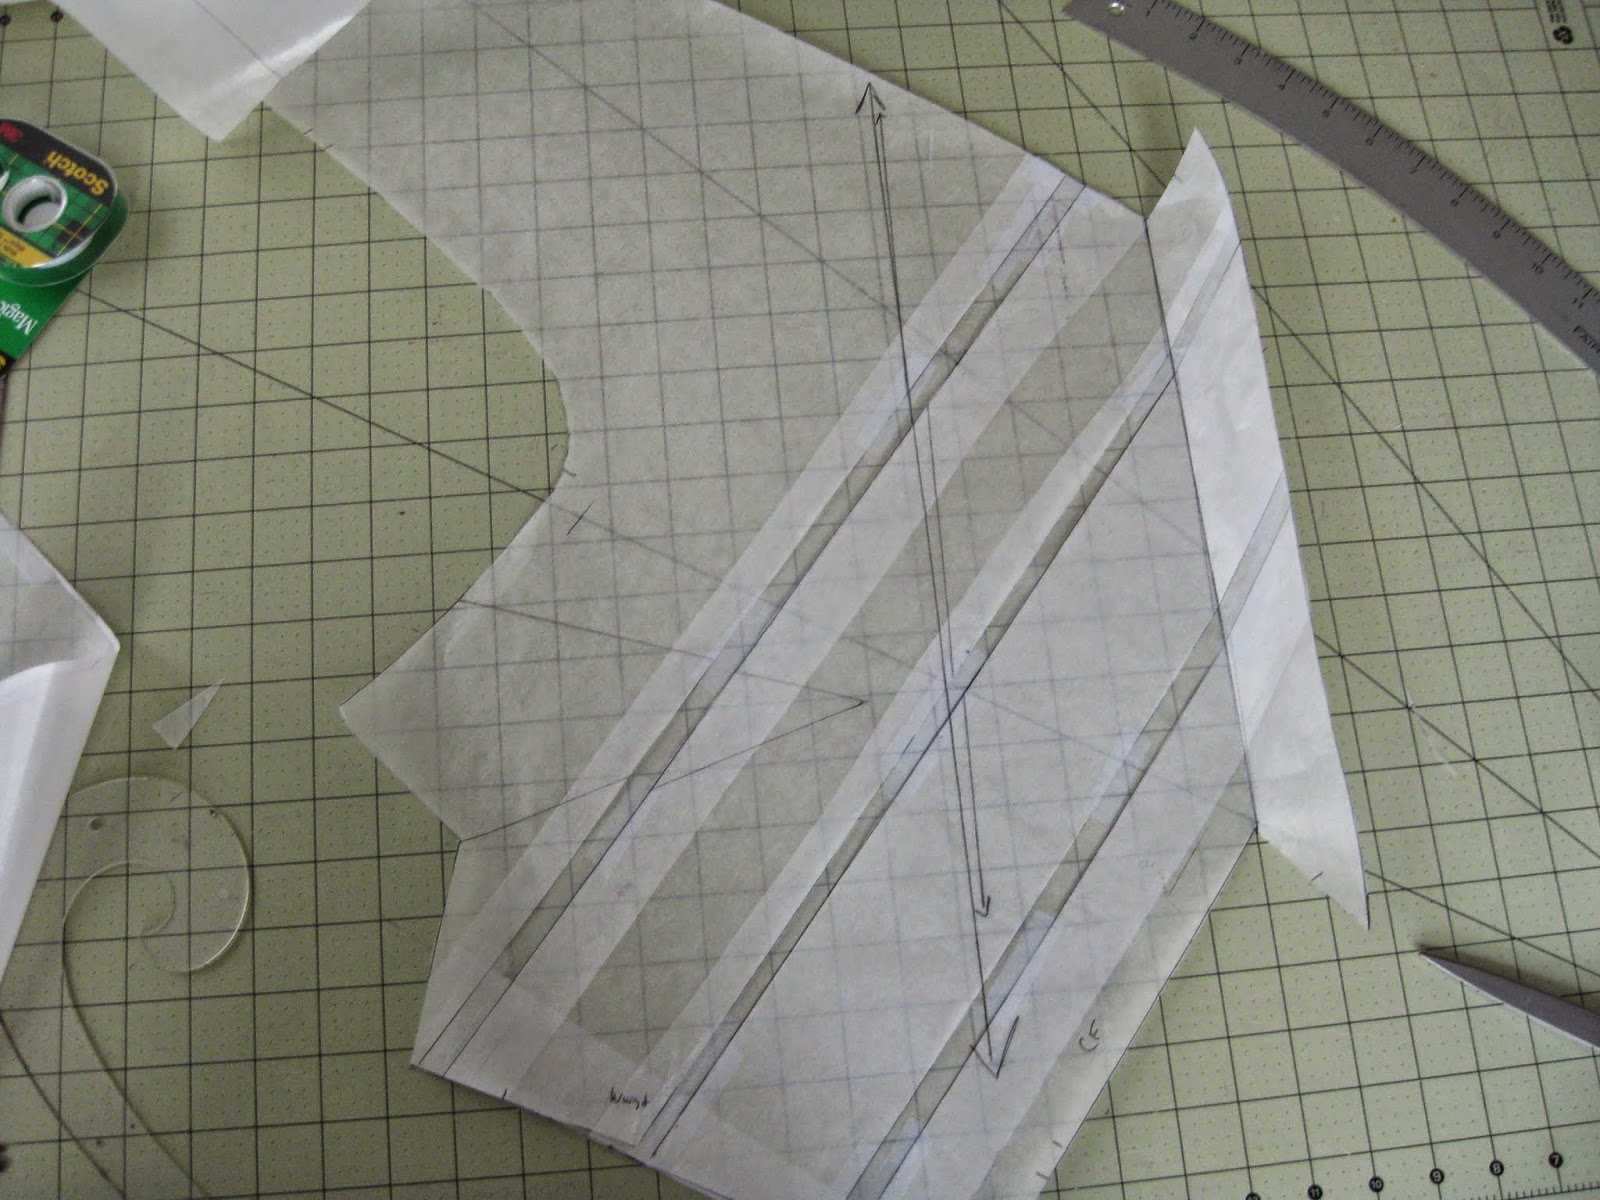
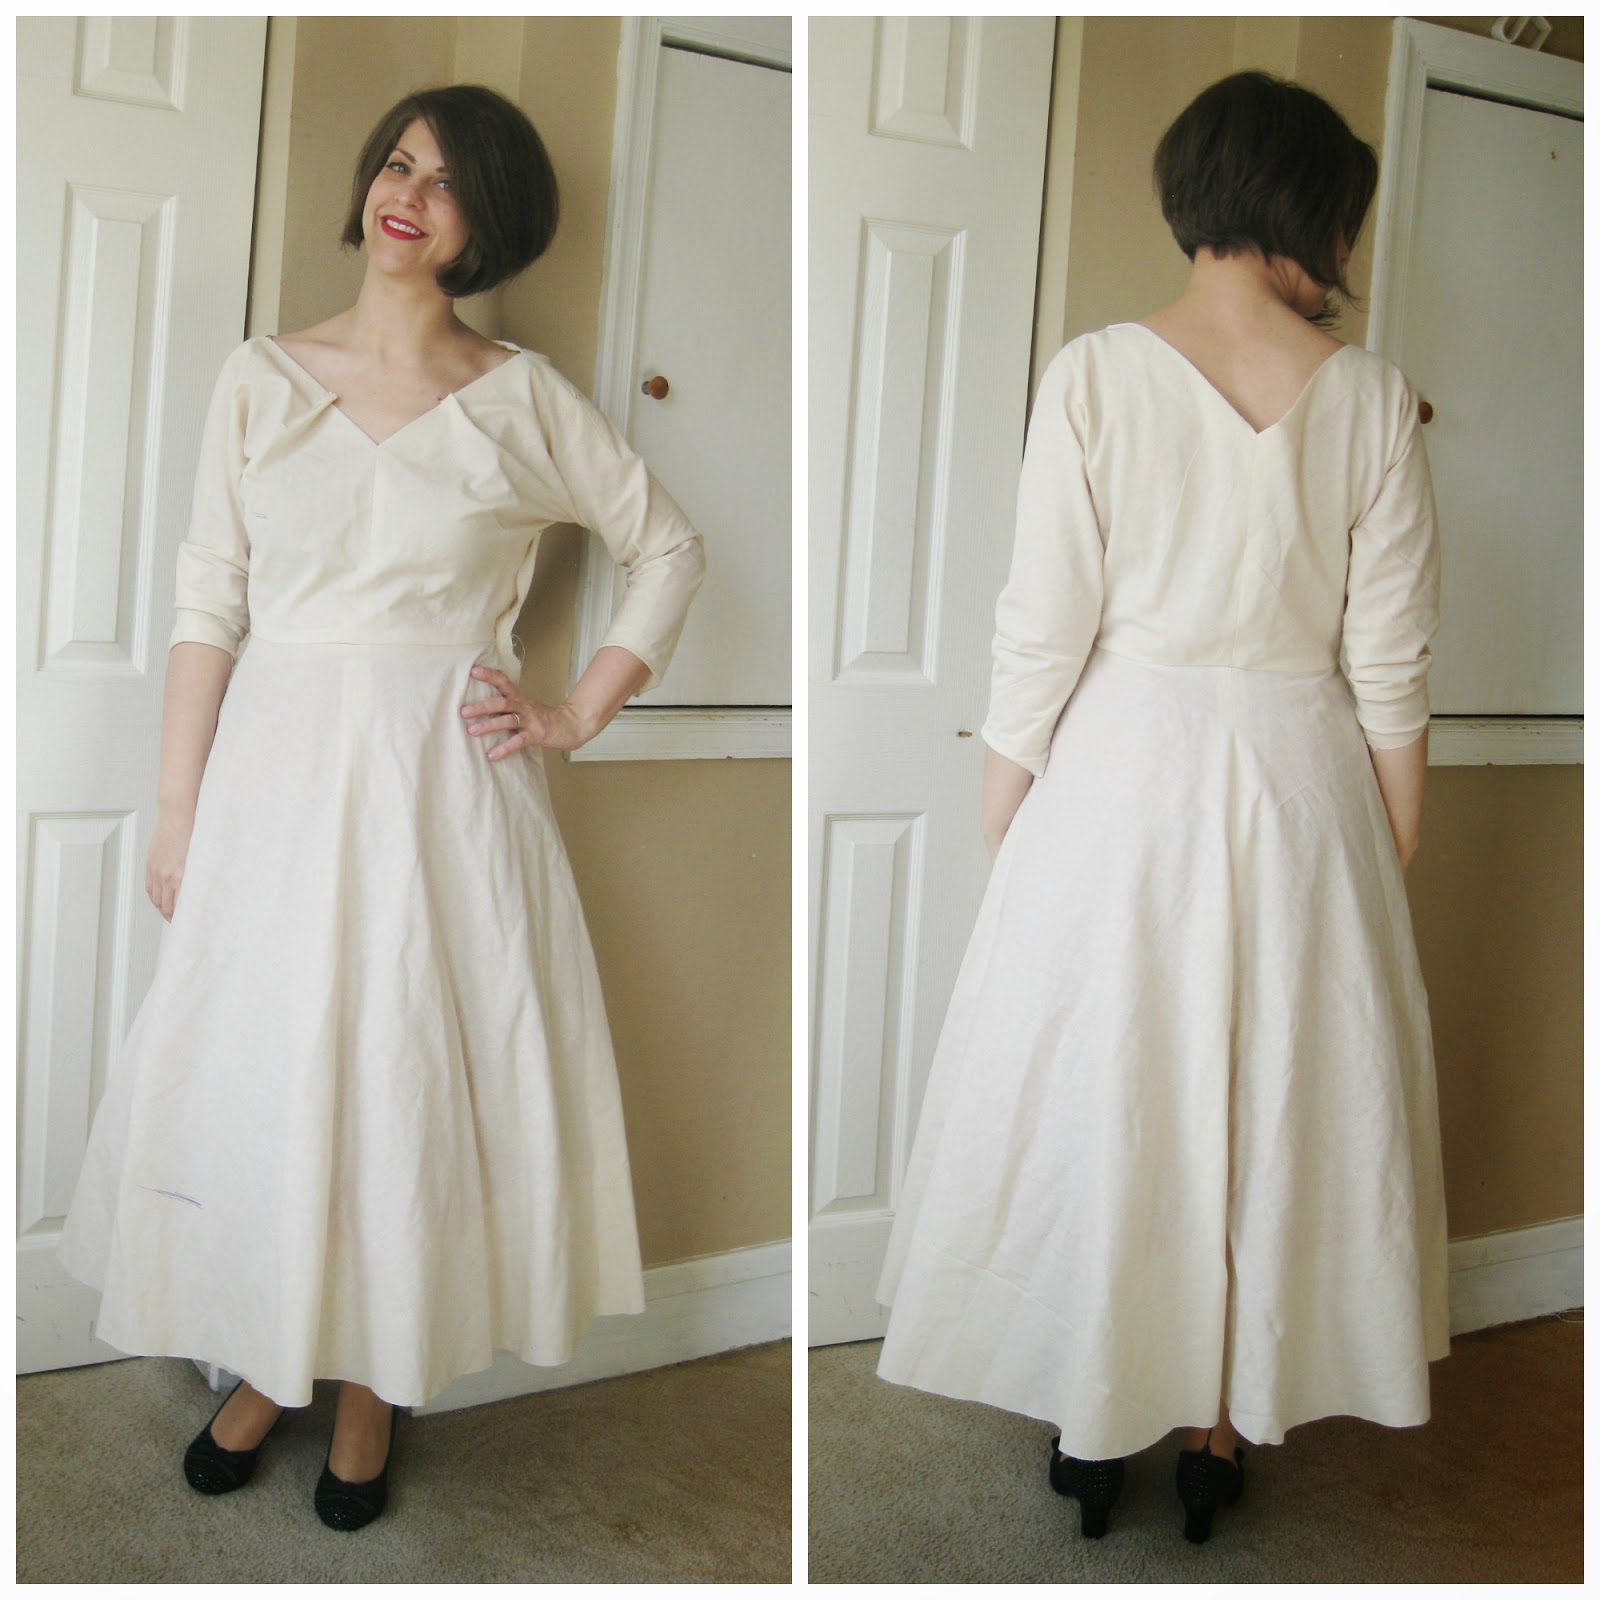
Just like in my Nettie/Flora dress combo I didn't make any changes to the body of the Nettie pattern. Thanks to the lower back scoop a width adjustment isn't necessary.  I did add a 1/2" extra width through the entire sleeve by splitting it down the center and adding there.  The width change is small enough that the sleeve sets in the armhole without any trouble.
I do have some trouble with the shoulder area of the top wanting to slip off  my shoulders. This isn't present in my dress version, so it surprised me a bit.  Guessing that the weight of the skirt pulling down keeps the shoulder area in place on the dress.  This soy/cotton jersey is also a bit softer, making it sag more than the polyester jersey of the "Nora dress." That's OK. I make sure to wear a nude bra and adjust the shoulders from time to time. Maybe I'll go back in and add some bra keepers if the mood strikes me.  Odds are that I'll be covering up the shoulder area with a cardigan soon enough anyway. Till then hijinks at the local law offices....hmmm that sounds like a fun Nancy Drew story.

Once more with feeling

This is the part where I would make some further "Buffy" reference if I'd watched more than one season of that show. I tried guys but it was too much teen angst for this 35+ lady. Truth is that "Firefly" is always gonna be my go to Joss Whedon series. This girl was raised on sci-fi and cowboy movies and the marriage of those two genres fills me with glee.
Also on my personal scale of hotness Nathan Fillion is an 11, whereas David Boreanaz is too vaguely neanderthal like to be anything higher than a 2. Sorry David, at least you have that "Bones" money to keep you warm.

Anyway I thought the title of the "Famous/infamous" musical Buffy episode was perfect for today's post because I've got sewing repeats to share. Yes you've seen these garments on me before but not with leather jackets and switch blades. OK, maybe not with switch blades either. Mal told me to misbehave but that seemed to be taking it a bit too far.

First up the denim Beignet I mentioned making back in August. Look dudes, actual follow through on blog plans. I owe it all to my Frog task master who dug around the stash and found an oddly narrow piece of stretch denim. It turned out to be the perfect amount for a Beignet skirt.
Image may be NSFW.
Clik here to view.
Worn with Nettie, a Target Scarf and that Leather jacket I sewed back in 2012
The sewing process went a lot faster the second time around. Partly because all the pattern pieces were traced and partly cause I knew how all the parts fit together.  The only construction change was to piece the pockets together with a lighter weight fabric to cut down on bulk. The pocket was cut about 2" away from where it connects with the side seam. Seam allowance was added to both sides of the cut and, Ta Da, a two piece pocket. I used a scrap of cotton/rayon for the majority of the bag and the self fabric at the edge.
The lining used on this Beignet is also a repeat from the stash. Is it an animal print? Is it a mod leaf print? You decide. Just know that you'll be seeing it again because it seems to be regenerating back in a dark corner of the stash cave. Wonder if it will teach this trick to certain other pieces of fabric.
One other thing to discuss, turns out that when covering buttons with stretch denim the color gets lighter. Maybe I should have tried interfacing the denim to see if that limited the amount of stretch. Oh well, that smart idea just occurred to me now instead of presenting itself to Past Heather. Curse you brain with your tardy brain storms! 
Enough about my anal retentive issues with button shades which no one else will care about. How cute is this with tights and boots? It's exactly how I'd pictured it. Guess Froggie knew what he was doing by making sure I followed through on my sewing plans.

But wait there's more, on to skirt number two. Remember how I put a black denim pencil skirt on the Fall Essentials Sew-a-long?  No, yes, no? Well I went with remaking Burda 127 pencil skirt with my hacked "lips" waistband.
Image may be NSFW.
Clik here to view.
Worn with a Target sweater, luxulite brooch, and a RTW suede jacket.
This denim is also medium weight so the facing was switched out with, gasp, more of the polka dot remnant. What can I say, that polka dot fabric is a shameless hussy when it come to jumping to the top of the scraps box. Only thing I'd change on the waistband is to use a heavier weight interfacing to help keep the "lips" standing up. One side always seems to be flopping over when ever I peek in the mirror.
I used stretch denim again so this is nice and comfy even with the heavier weight fabric. I fear for the state of my invisible zipper every time I pull it over the waistband seam hump, but otherwise this is an easy wear item. You'll have to take my word for it that the skirt has nice top stitching on the princess seams and the waistband. I wouldn't skimp on top stitching like I would on photos.
I'm starting to make decent inroads on the Fall Essentials Sew-a-long list now that everyone's immune systems have stabilized. But we can talk about that on a later date when the males of the household aren't looking at me longingly hoping I'll magically make some food appear. The small one warns me that I'm arresting his development and that it's a serious issue. Better start dinner before he calls child services on me.

My Sweet Chickadee

Facts you probably already know about me - I like red, garments with birds on them and anything that raises my core temperature above the freezing mark.

Fact you may not know - My favorite thing to knit is cardigans with colorworked yokes. A close second is cardigans that have decorative stitch patterns in their yokes instead of colorwork. Yokes, yokes, yokes! God I could go for some eggs right now.
Anyway, I'm all for trying new things, learning new techniques and knitting some crazy pattern just because you have a girl crush on the model.  But after you do all those things it's also OK to say, "You know, all I really want is a million yoked sweaters." Then proceed to knit the same sort of project over and over again. There's my knitting evolution in a nutshell.

When planning a little knitting for the Fall Essentials Sew-a-long it seemed smart to knit what I'd actually wear and use materials from the stash. My yarn stash isn't as big as the fabric stash, but that's not the same thing as saying "I have a small yarn stash". Oh no, pack ratting crafting supplies runs deep in my family. My grandmother build an extra garage/shed/purchased school buses to store all of hers. (That sounds like a joke but is 100% true.)

Back in my working days I amassed a healthy yarn stash, a bit heavy on the sock yarn side but still pretty good.  It hasn't depleted much since I started stepping out on it with the sewing machine. Sexy, sexy sewing machine......Oh sorry, drifted off for a minute. Annnnnyway, I popped the top off of the sweater part of the yarn stash and dug around to see what caught my fancy.  Why hello there bright red Filatura Di Crosa Zara, wanna be my main sweater squeeze this Fall?
Pattern is "Chickadee" from Ysolda Teague.  It's part of the "Little Red in the City" book which I purchased when it first came out and the proceed to knit NOTHING from it. Honestly I have a horrible reputation when it come to knitting pattern from books.  Is it the whole,"hard to transport compared a PDF" thing or that I just secretly like hoarding books?  Probably a little of both.
Back to the sweater.....there are plenty of DK weight odd balls laying around in a drawer, so I utilized those to do the yoke. Quick yarn break down for those that might be interested.  I think certain retailers where having a biggest yarn name contest.
White - "Biggian Design First Cross Merino DK."
Blue -  "Sublime Yarns Extra Fine Merino DK" Color name "Plume"
Black - "Filatura Di Crosa Zara" (I think) could be a sublime yarn too. Who the heck knows at this point since I'm the worst at storing odd balls.
Unlike most of my yoke sweaters, this one was constructed top down. My brain was a bit cranky about knitting a chart "upside down" so to speak.  But I bribed it with some cookies and got the old girl working again. The chart is nice and easy to knit, very few areas where you need to trap the float on the back. The majority of the rows have only 2 colors, so you can put one in each hand and get a nice rhythm going.  After the chart is done the rest of the sweater is "TV knitting." My shows of choice for this project were "Justified" and "Mr. Selfridge." I bet Piven would love to play a gunslinger. "Nailing it!" - (Up Yours Downstairs Podcast reference. If you're not listening to their Mr. Selfridge recaps then do it this instant!)

I knit a size 38 because my bust measurement was between sizes and my gauge was coming out a bit small. The cardigan is knit as instructed other than reducing the amount of St St between the waist increases/decreases and adding an extra waist increase. The booty, aka extra cookie storage, always needs more increases. The only thing I would go back and change would be to make the buttonholes smaller than 5 stitches.  In my stretchy yarn they came out large and I had to go buy enormous buttons to match them.
Enormous buttons or not I've been wearing this sweater everyday. Anyone else do that once they finish a big project? It's like my brain thinks,"Now I can finally be warm. You'll never rip this cardigan from my back. NEVER!!!" *Clutches cardigan to throat and laughs manically*

In closing I'll leave you with this ridiculous outtake. Mother nature felt I needed a wind machine to spice up my blog pics. Woooooo KNITTING!

Retroish Nettie Dress

Ponte dresses, they've been around for awhile right?  I have to say they've never struck my fancy until this year. Maybe the Ponte Fairy visited me in the middle of the night and smacked me up the side of the head with her double knit wand. Heee heee hee that tickles!

What also helped my ponte conversion was stumbling across a few lovely retro inspired styles on the net.  The Joan dress by Outerlimitz and the Joanie dress by pinupgirl clothing to point out a few. Oh if only we could all be Joan for a couple of days. I'd give my eye teeth to always have a witty bon mot ready to put people back in their places. Alas this is not my lot, instead I'll be over in the corner giggling about some weird crap I just made up in my head. Frog tutus, Bam!

Anyway, let's just talk about the dress, shall we?  I really liked the pleat detail on the Outerlimitz dress and decided to drop that into a Nettie dress with a few style mods.  To make the dress a little more retro looking I gave it a boat neck and lengthen the skirt 5".
Full disclosure here, the dress came out little shorter and tighter than I'd envisioned. I'm also wearing a Rago girdle in these pics to suck everything in a bit.  This ponte is 100% polyester and had a much firmer recovery than the rayon based pontes I've worked with in the past.  Does anyone find judging knit ease needed more tricky in pontes than say regular jerseys? Is it just me?
View of the side pleats.  Looking at the pictures of the Outerlimitz dress makes me think that they might have sewn down the pleats a few inches. Something similar to a shoulder tuck cluster.
Skirt vent on the back annnnd me being reminded how big my back end is. Better pop on over to youtube to watch "Baby got back" a couple of times.   P.S. - Crazy windy on picture day so enjoy some weird hair.

I need to size this dress up a bit to be comfortable wearing it, but that doesn't mean I can't give you some hacking instructions in the meantime. Oh yeah, hacky, hack, hack.

Hacking Instructions
1 - For the front trace the skirt portion of Nettie and mirror it so that you have the whole front. Add seam allowance to the waist since it will now have a seam. If you want to lengthen the skirt do it at this time.  I've added 5" of length here. When all your changes are done, cut out the pattern piece.

2. Chose which side of the skirt will have the pleats. Measure down 2.5 inches from the waist and mark the location of the first pleat.

3. Mark 3 more pleat locations 2" apart from each other.

4. Using the pleat location marks, draw 4 lines across the whole pattern.  Keep the lines parallel to each other, but they do not need to be completely horizontal across the pattern.

5. Cut the lines from one side seam almost all the way to the other. Leave a small paper hinge.

6. Place paper behind the cuts and open up the slashes to the width you want your pleat. On this dress I've spread them apart 1".  Tape down the pleats at your chosen depth.

7. Cut off all the excess paper to complete the front skirt pattern.

8. For the back trace the pattern on the half. Add seam allowance to the CB and draw in a vent intake.  I made mine 5" high and 1.5" wide.

9. I used the same technique for converting the neckline to a boat neck as outline in this renfrew tutorial. The shoulder seam doesn't need to be narrowed on Nettie. Place the french curve on the edge of the existing shoulder seam and redraw the neckline higher.  Here's a quick look at my back bodice.

10. On the front add two pleats in the same manner as you did on the skirt.  The lower pleat is 2.5" from the waist and the second is 2" away from the first pleat.

Sewing Notes
1. When sewing the dress, fold the pleats up towards the waist. Secure them with some basting before sewing the side seam. Once the side seam has been sewn the basting can be removed.

2. The neckline is finished in the same manner as the previously mentioned boatneck tutorial.

3. The back vent is top-stitched just like you would on a woven garment.

Oooooo Witchy Woman, she got the flounce in her skirt.

Happy Halloween everyone! Do you have any fun plans cooked up for tonight? We're planning on taking Desmond for his first real door to door trick or treat experience. Previous years he's been ecstatic about sitting on the door step handing candy to other kids. His brain might implode with pure joy when someone hands him candy instead. What ever happens I'm looking forward to raiding his candy stash later. We all know he's not gonna eat those Almond Joy's.
This year I was in the mood to sew a costume, but didn't feel like spending the money to buy materials for something that would hardly get any use. The extent of my Halloween celebrations are hiding in another room while my husband is on the candy distribution duty. Can't let those adorable kiddies have the chance to pass their germs on to me. I see you hiding that bubonic plague under your Iron man mask! Never trust a cad like Tony Stark.

So instead of a costumy costume I took a page from some Halloween lovers on instagram and hatched a plan to "Dress like a witch." Well not a Wizard of Oz witch, or a Hocus Pocus witch, or even a Stevie Nicks witch. No disrespect Stevie, I can't carry off a shawl like you. Instead I decided to focus on the basics, the color black and some stripes thrown in.  Everyone know witches love stripes, right? Probably cause they make your eyesight vibrate until your pupils go all crossed. Once you can see again it's too late, you're in the witch's sack. Muhhaaa! Cannibalistic Treats!
For my quasi witch outfit I chose the Kitschy Coo trifecta top and Burda 6834 for the skirt.  I've made the trifecta top a couple of times in more sweatery knits and liked the fit.  In this bamboo knit the upper sleeves and bust area seemed to be too baggy.  I went back and removed 2" total at the underarm and tapered that out to the waist and elbow area. The neckband was also reduced in width to 1/2".
Burda 6834 is basically a princess line pencil skirt with a flounce sewn to the hem. Mine is sewn in some light weight wool suiting that was laying in the stash. I'd been toying around with the idea of drafting some sort of flouncy skirt when JoAnn's had sale on Burda patterns. Natch, drafting averted! Now I can use my free time to carve intricate jack'o lanterns.
I do owe a big thank you to a lot of my lovely sewing friends on Instagram.  My first muslin of this pattern was less than stellar looking on me.  I wasn't sure what the problem was, but figured a picture on instagram couldn't hurt. Immediately you guys told me to shorten the flounce length and just like that the skirt was 100% times better. Thank you all!!!!

My final flounce length is between the two specified in the pattern.  I used view B's cut line as the hem turn line. A 5/8" hem was added on so that I could finish the skirt with a machine rolled hem. Might as well take advantage of black hiding everything and give Froggie the night off from hemming.  His paws were covered in chocolate anyway.

Pattern
Burda 6834 - Used a combo of size 16 for the waist and size 18 for the hips. People with normal sized rear ends most likely wouldn't to bump the size up in the hips.

Fabrics used
Shell - Lightweight stretch wool suiting.
Lining - Polyester lining.

Pattern changes/alterations
- Took in the back princess line seam 1.5".
- Cut down the front waist 3/8".
- Used the flounce cut line for view B as my skirt length. Added 5/8" hem allowance for a small rolled hem.

Confessions/Advice
- Instructions tell you to interface the top of every pattern piece.  I used a roll of fusible stay tape pressed into the seam allowance for this.

- I skipped hemming the lining because it is so far up into the skirt no one is ever going to see it.

- Skirts without waistbands are not my preferred construction. Would add one if I make this pattern again.

Husband Comment
"It's sexy and professional!" Now I feel like naming this look "Profession witch."

My Final Thoughts
OK, so I thought, "This is gonna be a special occasion type of skirt." NOPE! Gonna wear it allllll the time. Basic black, you always do right by me. However.....if I was to make another one in a bright color which one should I go with? Just don't say orange or brown because then Froggie will have to slap you. Sorry it's a house rule. The other house rule we have is "EAT ALL THE CHOCOLATE!" Hand over the bag of assorted snicker varieties and no one gets an evil hex placed upon them.  Happy Halloween!

It's like you're an Executive Secretary or Something

Today I'm not sure if I'm a 50-ish secretary or a fancy school teacher. "Ahem. Your attention class. This afternoon we will be learning about the native habit of the Monkey Frog, tireless helper in the sewing room.  Make sure you have your fabric prepared and don't leave any cookies unattended."

I put a white blouse in the Fall Essentials sewing list because it's one of those things everyone needs but isn't all that exciting to sew.  If someone comes up to you and says, "Oh my god, I'm just frothing at the mouth about sewing a white button down shirt," then back away slowly cause they have rabies. Maybe throw some hand sanitizer on them for good measure.

That being said I was excited to try out the new pattern to me pattern V-8747.  It's got a few design details to spice up the shirt without getting Tilton sister crazy.  No offense to the Tilton sisters, they're way more avant garde then I'll ever be.  So without further ado, here's my version of V-8747 both tucked and untucked.
(Side note - I've paired V-8747 with a wool Betsy skirt that was made way back in the middle of the summer. You're seeing it for the first time cause who wants to wear wool in 80-90 degree weather.)

I used some lovely cotton shirting from the now closed Waechters. It has a woven in strip pattern that seems impossible to photograph. You'll just have to take my word that it's tasteful and makes cutting things on grain really easy.
Since I've no stranger to shirt sewing and was using non temperamental fabric, this blouse went together with very little angst. The only problems I had were self created stupid mistakes....several stupid mistakes. In the interest of keeping it real, here are some of the stupid things I did while making this blouse.
- Fused interfacing to every collar, cuffs, button bands piece there was.
- Cut the tips off of my collar when trying to grade down the seam allowances. Had to recut a new collar.
- Put button holes on the wrong side of one of the cuffs. Didn't even notice this while I was sewing on the buttons. It wasn't until I pressed the shirt that the mistake was finally noticed.

Thank god for extra fabric to fix dumb mistakes! Or maybe I made stupid mistakes cause there was extra fabric? Or maybe I shouldn't sew while my Quality Assurance Frog is taking a nap.  Ahhh my head!

Pattern
Vogue 8747 - View D

Fabrics used
Blouse weight cotton from Waechters. (Stashed)

Pattern changes/alterations
- 1/2" Sway back adjustment.
- 1/2" Forward shoulder adjust to bodice and sleeve.
- Shaved down the front of the sleeve cap about 1/8" to get the sleeve to fit without puckers.

Confessions/Advice
- I'd strongly suggest cutting down the neckline seam allowance to at least 3/8". The 5/8" seam allowance given is too large to sew the front curves without lots of clipping.

- The bust point must be low on this pattern because I didn't need to make any changes to the gather location. Those of you with higher bust points might need to raise this area.

- On a button down with higher buttons the shoulders would be perfect.  However since the neckline pulls open more I find the shoulder area looks too wide. Might narrow it a bit in the future.

- I could take a bit of ease out of the side seams on any future versions.

-  I did replace the cuff with the buttonholes on the wrong side. At least all that needed to be ripped out was the seam attaching it to the sleeve.

Husband Comment
"Wait....did you make that? Really?  I like these gathered things on the front. Makes it look like your chest is trying to rip open the shirt."

My Final Thoughts
This pattern is a nice twist on the traditional button down shirt. With the princess line seams and bust gathers you get a feminine look that is still work appropriate. Think I erred on the side of too much ease with this version, but that's easily fixable.

The fact that my husband didn't believe this was a hand made shirt did make my day. Let's not tell him about all those sewing mistakes....oh wait he reads the blog. I'll have to use the Jedi mind trick on him now. "These are not the blog post you were looking for. Move along."

The Holy Grail of Jeans

In the past I've talked about my problems with pants fitting in general. The crux of the problem being my giant backside and the amount of pattern manipulation needed to cover it. Scotch brand tape probably sees their stock go up when ever I try to alter a pants pattern. Quick Froggie, bring me another roll....or maybe a 3 pack.
Despite fitting aggravations, I've been amassing jeans supplies for years.  I've bought every jeans related class on Craftsy and tried numerous patterns. Most of them were complete failures and I smashed the multiple muslins into the trash can in a hulk like rage. Why so many jeans patterns for people with flat butts?  Can't those of us with bountiful booties have one? Cause I've tried to reverse engineer a "flat butt" pattern and it always goes sideways once you start adding 3+ inches to the rise. Not even kidding about the numbers here, the big booty genes are strong in my family.  It had gotten to the point where I'd thrown my hands up in the air about sewing jeans and decided to purchase NYDJ jeans from now on. (Side note - Best fitting RTW jeans I've come across. They don't gape in the back and the rise is longer than most. Though if you've got a big booty don't size down like they tell you.)

So I was never gotta try a jeans pattern again until Heather posted that she was releasing one. Heather is a bootylicious lady like me! Does this mean that big booty ladies finally have a jeans pattern?  I creepily tweeted her that my butt was very excited about this new pattern. At least I didn't attach a picture.
My hope for a big booty friendly pattern turned out to be true. I selected the higher rise skinny leg version and only made a large calf alteration before making a muslin. It fit better then most of my "real" pairs of sewn pants. Ahhhh it's so good when the fit model is closer to your figure than not.
I did go back and make several more fitting tweaks before sewing up this pair.  The next pair will have a few more fitting tweaks. That's pretty much pare for the course when it comes to pants fitting on my figure. That and there will always be wrinkles in the back of my legs because I need that ease to sit down. Curse you butt, can't your fullness be higher? Nope. Also giant calves and skinnies don't really mix,. But that's the style of jeans I like right now so screw it!

Those unfixable fitting issues aside, these are the most comfortable pair of jeans I've made to date. For once I want to make another pair of pants rather than run screaming towards some knit jersey. That's like winning the lottery in my book, the jeans lottery!

Pattern
Ginger Jeans from Closet Case Files

Fabrics used
- Dark Navy stretch denim - I think this one was a designer roll end purchased from Hot Patterns. They don't sell fabric anymore but it was a good score at the time.
- Left over Chambury for the pocket bags and waistband facing.
- The top-stitching thread is Gutermann brand - Color 1870
- Jean's button from Cleaner's supply company.

Pattern changes/alterations
Quick run down of my lower body fitting problems - tilted waist, small lower back/sway back, large butt, post baby gut, full thighs, large calves and ankles.

1. Made a large calf alteration by slicing up the middle of the back leg. See Cation Design's pants fitting post for more info. This added about 1/2-3/4" extra circumference in the calf area. (My calf circumference is 15.5")
2. I also increased the calf circumference by folding the pattern up 1.5" to the knee and adding the same amount of length to the bottom of the pattern. (Most of that length was cut off later.)

3. Added 3/8" to the inseam of both the back and front legs since I carry a lot of weight in my thighs.
4. Increased the back rise 1/2" on the line provided on the pattern for my big butt.
5. Added 3/8" to the front side seams at the waist/pocket area and blended it out. This accommodates some of the post baby gut.
6. Took 3/8" off the CB seam of the yoke since my body starts narrowing as it goes to the back waist.

7. Darted out the back waistband 1.5". This the mid rise hits right at the narrowest part of my body and I needed to take a large amount out to get the waistband to lay flush on my lower back. Used 3 1/2" darts to reshape the waistband.
8. Reduced the length of the pants legs by 2.25". I cut it off the bottom rather of the pattern instead of using the shorten/lengthen point.

9. Moved the pocket placement up significantly. My muslin showed that the pattern's pocket placement was too low for my butt shape.  I might have overcompensated and put them too high. They are 1.5" down from the yoke on the side seam side and 1" down from the yoke on the CB side. For now I'm holding off on putting in rivets until testing out placement on the next pair.

Confessions/Advice
- Since the stitch quality on my old machine is pretty crappy, I sewed these all on one machine. Pre-reading the instructions and grouping top-stitching verses regular thread tasks is the way to go.

- Didn't mention it on the blog, but due to a sizable donation from my sister I was able to get a new Bernina sewing machine in the middle of the year. It proved it's worth on this project as it chugged over multiple layers of denim without a problem. I did find that increasing the bobbin tension a bit worked well when using the top-stitching thread on the top of the machine.

- The instructions for Ginger Jeans are excellent. Each step has both a written instruction and pictures. Despite sewing numerous fly fronts the order of assembly is never retained by my brain. Heather instructions for this are easy and give you a great finish. Have no fear of fly fronts!

Husband Comment
"Looks great from the back." Which made me think of the 30 Rock "Brooklyn without Limits" episode. Don't think Tracy Jordan would have a problem with my butt size.

My Final Thoughts
I pretty much feel like my search for the perfect jeans pattern "for me" is over. I could jump up and down....so I did. You'll be seeing more of this pattern since all that hoarded denim can finally be sewn up. So, so, so much denim.

Last Bit of Fall Sewing

There are 2 more sewing weeks left before the Fall Essentials Sew-a-long is over, but boy is my schedule packed. This week is going to be all tutorial writing, pattern testing, blogging already finished makes and maybe a little Christmas sewing. The following week is going to be spent baking and then visiting relatives far away from the mini sweat shop. How's a girl supposed to plaid match a shirt dress with all that going on?   Gotta get myself a gaggle of sewing elves to continue garment production in my absence.

Before we get into reviewing my FES report card, I do have one more item to show you. One gray pleated "school girlish" skirt.
This pattern is from Burda Sewing magazine - issue 11/2009, pattern number 116. I liked the cluster of side pleats and thought it might be less bulky looking than an all over pleated skirt.  Burda 116 is a "front is the same as the back" affair with an invisible zipper on the side seam. No lining, no pockets, no darts, pretty much a beginner type of skirt.
If this fabric looks familiar it's because it's the "gray denimy stuff that must have wool" fabric that was originally earmarked for a shirt dress.  I had second thoughts about wearing this next to my skin and decided it would work better in a lined skirt.

Since this design was free through out the hips, I skipped the usual muslin stage and fit it on the fly. Started with the size 44, basted down all the pleats, basted one side seam and then tried it on.  The skirt needed around 1/2" removed for each side seam. Then it was easy to cut down the waist seam allowance a bit and apply the same change to the waistband.  Excellent! Froggie was pretty sure not making that muslin was going to haunt me.

I also made a few personal design choices on this skirt.
1. Burda tells you to draft a rectangular waistband for this. No thank you, I'll pull out my trusty self drafted curved waistband instead.
2. As drafted the finished length of the skirt is 31.5", which would be around mid calf on me.  I was pretty sure this would be really dowdy looking and reduced the skirt length to 24".
3. Added a lining to the skirt by cutting the Front/Back piece in lining and shortening the length by 1.5".
If I could tell past Heather to make one change, than it would be to remove the pleats from the lining to reduce weight. Both the self and lining fabric are light weight, but it adds up to one heavy skirt. Yikes! Every time I take it off the skirt hanger I'm slightly concerned for the health of the invisible zipper. Hang in there buddy. You've got your friend hook and eye to help you out.
Overall this skirt is comfortable and kind of fun to wear when you swirl it about.  However does add more bulk to the waistline area than I'd prefer. I'm not unhappy about making the pattern, but it's not going to be one that gets a remake.

OK. Now that I've squeaked the last garment in there, let's see how well this easily distracted sewcialist stuck to the Fall sewing list.
Fashionable Foundations
1.  Black denim pencil skirt - Completed. Already a little faded due to a poor washing decision. Probably should re-dye it black.

2. Wool circle or pleated skirt - Completed. As if you didn't know. ;)

Chic Chemises

1.  Ysolda's Chickadee out of stashed yarn - Completed.  It's been worn weekly so excellent wardrobe planning there.

2. One or two long sleeve Netties - Completed.  I sewed a solid green, solid black and a leopard print Nettie. You'll just have to take my word about the unblogged ones.

3. Vogue 8747 - Completed. Though I should take in the side seams a bit because it's yet to be worn.

Fabulous Frocks
1. McCall's 6696 - Not Sewn.  When I decided that the gray denimy wool was too itchy for a dress this got put on the back burner.  I've since bought some plaid shirting that would be an excellent shirt dress......if there is enough. I got the bolt in so instead of a full 3 yards there is only 2.5 which might not work with plaid matching.

Tender toesies
1. Hand knit socks Completed. Finished the "on the needles" sock project in plenty of time. Hooray!

Those Cozy Nights
1. Laura Lounge pants Not Sewn. Never bought fabric to make another pair of Laura Lounge pants. With my fabric buying track record that's not the worst thing.

Baby it's cold outside
1. Ottobre coat - Not Sewn. Couldn't get around to starting this before it go really cold, which was this weekend. Right now the plan is to make this a first of the year sort of project.

2. Hand knit berets - Had to frog.  I did knit a red beret using Ysoda's rose red pattern. I'm not into swatching for hats and sometimes that does bite me in the ass. In this case the finished beret is much to too and needs to be be reknit on smaller needles. No black beret was started so I only get half points for effort.


There was also the Fall Essentials addendum list which included:

1. Snow leopard top
2. Cobalt skirt or pants
3. Magenta top or skirt
4. Anything hot pink
5. Black and white striped raglan
I sewed everything on this list with the exception of the cobalt skirt/pants. Can't bring myself into cutting into the 2 yards of cobalt sateen in the stash. Maybe in the new year.

Out of 15 planned projects, 10 were completed. This might be a personal record for this girl who thinks sewing lists are just bossy pieces of paper. :). For that I'm forever grateful to Sarah who did the hosting work for this sew-a-long this year. Thank for giving me the "push" to finally make some of those basic pieces I really needed. 

Voom, Voom, Violet

Hey folks, I'm standing out on this patio in my sheath dress wondering when the cocktails will arrive. What? This is a state park and open bottles are frowned upon.  Well I never! I'll have you know that Smoky the Bear invited me personally and he mixes a mean chocolate martini. Only you can prevent forest fires and sobriety.
While I'm waiting for Smoky to bail me out of the drunk tank, let's talk about the dress. I'm wearing the newest pattern from Bluegingerdoll, the Violet dress.  This was actually the first ponte dress that was sewn during the Fall. The one that got me thinking about adding a few ponte pieces to my cold weather wardrobe.

Like the Bonnie pattern, you get a few mix and match elements with Violet. Choice of short straight skirt, long straight skirt, or flared circle skirt and 3 sleeve lengths.  You can see them all over on the Bluegingerdoll blog if you've got the itch. I've sewn a straight View A, long straight skirt with 3/4 length sleeves out of some rayon ponte. Queue the technical sketch!
Boom! You know I have a torrid love affair with technical sketches. That way you can see the yoke detail without squinting.  The separate yoke gives you a color blocking option or added visual interest in a solid colored fabric.  A little extra pizazz if you will.
Fitting changes I made to the pattern were...
- Standard Forward shoulder adjustment of 1/2".
- Sway back adjustment of about a 1/2". I could go back and take a bit more out there.
On a second version I'd probably narrow the back waist a bit or put some darts in since some fabric is pooling over my sway back.
Quick side bar discussion about ponte - After making a few things out of ponte fabrics of various fiber contents, I'm going to stick to rayon based ponte.  For one they feel really nice next to the skin. I can't say that about the polyester ponte used in the Nettie hack here.  Rayon ponte also is more forgiving on the lower half of my body.  The skirt widths are exactly the same size between Violet and the Nettie hacks, but I consider the Nettie to be too tight.  I'm happy with the fit on the Violet skirt in a rayon ponte. It shows some curves, but not more than I'm comfortable with. Side bar discussion closed. 

Getting back to the pattern, I would recommend ponte or another stable knit for the straight skirt versions.  For the flared skirt version, there's no reason you can't pull out some regular jersey and make yourself a swishy skirt. The only other notion you need for this is some clear elastic to sew over the bust gather. All in all it's a 2 hour sewing project once the fitting is worked out.

Violet is now available over in the shop as a PDF, with the paper version to arrive soon. If you're interested the code "Violet" will give you 10% off until 11/26. Until then I'll be staring at the horizon for Smoky the Bear.

P.S. Somehow Abby and I shared a hive mind and made this view in almost the exactly same color blue. Quite a feat considering this ponte has been in my stash 2+ years.

Ginger Jeans Part 2 - Leopard Party

Today I'm straining the edges of tasteful dressing in the form of leopard jeans. Yes that's right, leopard jeans.  Meooowwww. Jungle January has come early.
Last year Marcy Tilton posted this denim and I resisted it for a long time. A loooong time considering that my browser finds it's way to the website pretty much every day.  Then one week Marcy put this fabric on the "deal of the week" page and only a saint/lover of nothing but solids could resist leopard print denim on sale. I am neither one of those things and leopard denim came to live in my stash. I hear Pretty Grievances yelling "Ahem!"
These were sewn right after finishing my first pair of Gingers and some further fitting changes were made.

1. Reduced the front rise by 3/8".  The rise was definitely too long on the previous pair. I'm a bit unsure if it's the correct length now, as this area is always hard for me to judge.

2. Added more width to the front waist area by cutting into the fly area and spreading 1/2". This gives more room for "post mommy gut" and the like.  I went a little too far with this adjustment and need to scale it back to half of that amount of ease.

3. Cut down the front of the jeans 3/8" at the zipper and graded out to zero at the side seams for my tilted waist.  This is a pretty regular alteration for me, but I talked myself out of it on the first pair.  Probably cause I don't notice pants cutting into my waist until actually sitting in them for any amount of time.

4. Extending front of waistband to match the full tummy adjustment.  I put 1/2" extra on the end of the waistband.

5. Moved pocket placement 1" lower than previous pair.....scouts honor. My pockets are hiding like leopards in the the veld.
I didn't think of any new changes to make to the back view until this pair was almost done. So you'll just have to avert your gaze at my drag lines again. Or we can all agree on the lie that the leopard print totally obscures them. Let's Sgt Schultz this affair up, "I saw nothinz, Nothinz!"
Side note - How weird is the premise of Hogan's Hero's now that you're an adult? "Let's make a show about American POWS in a concentration camp and make it a zany comedy.  Haa Haa Haa Nazis!" Ten year old Heather thought it was great. Fooled you again Colonel Klink, when will you ever learn.

Back to jeans....on this pair I broke out the rivets and then spent about 2 hours hammering on my cast iron frying pan and while cursing rivets and people who make rivets. AHHHHH, my inability to hammer a nail/anything nail like in straight strikes again. My kingdom for more upper body strength or maybe a berserker rage state. That would show those rivets who's boss.
So if you're like me and this is your first time battling rivets I'd recommend buying some extra packs. That way when you stupidly try to hammer them in from the front and the rivet bends sideways you can throw it away.  Then google installing rivets and find out you're supposed to hammer then in from the back. Oops. (Mine still bent side wise 75% of the time. I curse you rivet!)

So that's the skinny on this pair of Ginger jeans. Here are some of the fitting plans I have in mind for the next pair.
1. Take out some of that hip ease that I added to the original pattern. I tend to forget that denim relaxes as you wear it and end up with baggier pants than expected.

2. Try that trick up making the back inseam 1/2" shorter than the front. I never remember this one when making pants until it's too late.

3. Reduce my full tummy adjustment by half.

4. I may need to dart the yoke out just a bit. Again it's loosing up back in the area during wear.

5. Barter an unholy deal with the devil were in all my rear fittings issues magically disappear but I have to contend with a Rosemary's Baby situation.  LOL, Nope.  Never gestating again until it can be done in a remote location. Oh dear I've horrified Past Heather. Tell her to stop trying to hide against that wall to escape devil babies. We'll just eat some more cookies to fill out those wrinkles. Problem solved.

Operation Xmas Dress, Part 1 - The Pattern

Last December I wanted to make a Christmas dress.  There was no exact pattern in mind, just hazy thoughts of something with a V neck, sleeves and a full skirt.  Oh and it had to be green, soft forest green.  Crazy right? You'd think little miss "red is a neutral" would be all over a bright red dress. Seems my subconscious wanted something a little different.

The dress didn't happen last year because the whole house got some sort of horrible chest cold right at the beginning of December. Merry Christmas! Hope you didn't need that lung. I spent most of December in a zombie state of sickness until finally going to the doctor to beg antibiotics.  (Side Note - Middle aged male doctors who act like you're being dramatic about a "slight chest cold" can suck it.) Annnnyway, once the drugs kicked in there was only time to whip together a quick knit dress for the 25th. Any disappointment I might have felt was negated by finally being able to lay down horizontally without going into a 10 minute coughing spasm. Thank you modern medicine.

I thought the green Christmas dress was one of those passing sewing fancies that would dissipate after the hard deadline had passed. Don't know about you, but that sort of thing happens all the time around here. Must be some weird deadline induced creatively left over from college.  However the green Christmas dress did not go away. It danced around my brain on a regular basis, a riddle that had to be solved.  The basic bones of what I wanted in the garment were still the same, V neck, sleeves, full skirt.  But nailing down an actual pattern continued to be difficult. Several options and hacks were considered, but they all felt wrong. In fact I had that annoying sensation that I'd "know the pattern when I saw it." That's great intuition, but where the heck is a girl supposed to look after tossing the stash and surfing the web?   Then late November I was browsing vintage patterns on Etsy and I SAW IT!
BAM - McCall's 9572. V-neck? Check.  Sleeve? Check. Full Skirt? Check.  Add simple looking to sew, but still elegant. Check, check, CHECK! I was also lucky this pattern wasn't one of those wildly popular vintage designs and thus had the very affordable price tag 15 bucks. Heck I buy new patterns more expensive then that. So everything was coming up Heather except for one slight snag, the pattern wasn't my size.

Yes my sewing friends, this particular pattern was a size 14.  My vintage size hovers in the 18-20 range, depending on the manufacturer. The body measurements for the dress are  Bust - 32, Waist 26.5, Hip - 35, a full 4 inches smaller than any of my measurements. A quick search of the pattern number showed that this was the largest size available for purchase. If I was going to make this dress than I was gonna have to grade it up. So I bought the pattern and graded it up, but that is a story for another day.

Operation Xmas Dress Part 2 - Grading

When last we "talked" I'd stumbled across the perfect vintage pattern for my Xmas dress only to find it was several sizes too small. It's times like these that I wish that my genetic stock was a little more "willowy" than "sturdy." But what are you gonna do, not eat cake? Perish the thought!

Anyway the obvious solution was to grade the pattern, but I balked at this at first.  To be honest grading is one of those things that I don't really understand  Once you get beyond, "increasing the size of the pattern by increments" my brain just zones out thinking about when it can eat cookies. Cookies are much more interesting than mathematical problems.  This is why I have to bribe my brain with cookies to do mathematical problems.  

In the end I decided to buy the pattern and give grading a shot for two reasons.  The first was that I'd done a 4" grade on the Brasilia dress and that turned out fine.  Secondly McCall's 9572 is a fairly simple garment and there weren't more than 4 pieces to worry about. Surely even a grading nob can manage 4 pieces. At least that's what I told myself while pressing purchase.

So hopes were running high when my pattern arrived and I gleefully traced out the bodice pieces. It was then that it struck me, A - the bodice is on the bias and B - now which way do I grade this? There was also the added question of what to do with the kimono sleeve.  How much grading did it need and were would one put that grading? I decided to just grade the bust and waist area and hope that kimono sleeve was wide enough without changes.
After staring at the pattern piece a bit, I decided to put the grading parallel to the CF. Spoiler - This Was Incorrect. But hey I do stupid things so you can learn from my mistakes. Yeah that's it. 
Here's my pattern piece with the grading lines running through the neckline. You'll see why this was a bad idea in a minute.  But first let's talk about a 4" grade for those that may know nothing about this.  

OK, so my pattern needs 4" of width added to it. I want to take the total amount of extra ease needed and divide it by 4, because each pattern piece is a quarter of the total width of the garment. Luckily for me this is elementary math and even my brain can spit out "add one 1 inch to pattern" without strain.   To add the inch to the pattern, 3 lines are drawn on as cutting guide lines. The pattern is cut apart on these line and then taped back together with the extra ease added between them. The inch is broken down to 3/8" added to the outer line, 1/2" to the middle line and 3/8" to the other outer line. This process is repeated on the back and in the end you have 4 extra inches added to the pattern.  And that my friends is minimum explanation of a 4" grade.

Now I have blurry muslin pics. Hooray? Here's muslin #1 with a petticoat underneath.
OK, so the reason you don't want to add an inch to your neckline is that you get a gappy neckline. No shit, Sherlock.  But as you can see this didn't occur to me until after I'd gone and done it.  Other fitting issues I noticed were that the skirt is too long for my 5' 6" height, the bust dart is in the wrong place and the cuff area of the kimono sleeve is too tight.  On the plus side the waist area fit perfectly and I could see the torso length was almost right.  

With all that information it was time to go back to the drawing board and regrade my bodice. This time I put the grading lines parallel with the grain line.  On the back I had to skew them off grain slightly to get 3 to fit into the waist area.
I also dropped the bust dart 1.5" and added just a bit more width down at the cuff of the kimono sleeve.

With those changes I decided to sew muslin #2 to make sure my grading change was successful. Here's the pictures of that version.
A non gappy neckline is a plus and my waist area is still fitting nicely.  Of course the dress still needs my personal fitting tweaks to look really good and we'll talk about those in part 3. Ooooohhhhh, more muslin photos just waiting in the wings. I beat you can hardly wait.

What I did and didn't wear this year

First off let me apologize for disappearing right in the middle of the Christmas dress series.  The germs found me and I had to let go of all my grand December blogging plans. Life does like to mess up your plans, doesn't it? The good news is that the Christmas dress did get finished on time and I promise to continue the series in January.

Today I wanted to do a year in round up of sorts. My original plan was to do Gillian's top 5 lists, but with all the germs and visiting relatives the time got away from me.  Instead I'm going to do a variation on that theme and give you some lists of my own. So grab some refreshments and find out what I really wore this year,

Patterns/Garments I was excited about and then never wore.
1. By Hand London - Flora Dress
I looooved sewing this dress. I love the fabric and looking at photos I still think it's a flattering garment. However it was never worn during the summer.  Last week I put it on to wear with tights and sweater and immediately took to back off again. The problem is the skirt length. Above the knee just isn't for me. I like plenty of length for bending over and to have my knees covered.

 Image may be NSFW.
Clik here to view.
I had high hopes for this hack and instead sewed up a dress that didn't appeal to me at all. Oops. I'm starting to think that while I love piping details on other people, it might be something that doesn't work on me.

Image may be NSFW.
Clik here to view.
I have no idea why this dress never got worn.  "Maybe" the full skirt seemed less flattering than my other wardrobe choices?  Who knows! There were other garments that didn't get worn, but most of them I would chalk up to my changing taste in clothing.


Patterns/Garments I thought weren't my style but then got worn to death
If you had told me last year that I'd happy wear a bodysuit in 2014 I would have laughed in your face. Full out cackling with maybe some pointing in your general direction.  "HAA HAA HAA! You don't know me at all." Well the joke is on me because Nettie turned out to be one of my TNT's for the year. I'm wearing one right now while typing this blog post. It turns out that if a body suit doesn't give you a constant wedgie, like the ones in the 80's did, then they are really comfortable to wear.  I also found them to coordinate well with all the skirts in my closet. 

Image may be NSFW.
Clik here to view.
I've never been a big fan of skirts with gathers at the waist, because more bulk in the area always seemed unflattering.  However when I won a copy of the Emery pattern from Jennifer there was no reason not to try it out.  On Emery the amount of fabric that gets gathered at the waist is significantly less than vintage patterns. For me this worked out great and I found myself wearing these skirts often during the summer.

Image may be NSFW.
Clik here to view.
 
As I stated back in the original review, maxi dresses aren't my thing and I only bought this pattern long after the fact for the bodice. Then I went and made this pattern out of one of my "precious" Etsy purchases and fell in the love with it.  The dress is a "having a good hair day" sort of garment since it screams for attention. HELLOOO, I'm red and dramatic!   However I did wear it many times during the summer and was sad to pack it away when the cold temps set in.  (Side note - the origin story for the Tiki Goddess was probably the most fun I had writing this year.)


Patterns/Garments that I knew were gonna be awesome and were. ;)
Image may be NSFW.
Clik here to view.
Pencil skirts and I go together like peas and carrots.  I love both the silhouette and find then comfortable to wear when made up in stretch wovens.  So it's no surprise that the Betsy pencil skirt is my other big TNT of the year.  At this time I've made 5 of them and still have plans for more. This denim version with the pleated kick pleat is my favorite out of the bunch.

Image may be NSFW.
Clik here to view.
I fell in love with this pattern at first sight and knew exactly what fabric to use. Lucky for me the finished dress turned out just how I'd imagined.  It's pretty, comfortable and rates as one of my top makes for the year. I put it away for the summer, but missed it so much that it go dug back out and wore it with sweaters and tights. Never leave me again Lea dress. 

Image may be NSFW.
Clik here to view.
How could it not be in the year in wrap up? It is the dress to end all dresses! OK, I'm a little biased since the fabric will always be amazing and because the dress did win me some Dolly Clackett swag. Thanks Roisin!
This dress was one of those projects where the fabric tells you what to do and you just follow instructions. At the end of it you've had some fun but are some what amazed that you had anything to do with the dress. "Did I just make this....Sweet!"
I don't wear this dress as much as the other things in my list.  It's on the fancy side and the I don't have lower shoes that match as well as the 4" grape heels. (I love me a pretty shoe, but I'm not grocery shopping in 4" heels)  Despite that this dress will always be a favorite because it was made for a great reason, the Dolly Clackett sew-a-long to celebrate Roisin's wedding. 

Hope you enjoyed my little year end wrap up. Personally I like to find out what things really get worn after the initial, "I made this!!" feeling wears off. It's also a good reminder for me that trying patterns that that I initially wrote off sometimes yields great results.

In closing I still feel very blessed to have met so many like minded people through sewing and blogging. If if wasn't for this blog and social media I wouldn't have anyone to discuss patterns, fabric hoarding, fitting and the like. Thank you for reading and commenting through out the year. I hope that all of you a happy and productive 2015. 

Operation Xmas Dress Part 3 - Fitting Adjustments

At long last another post in the Christmas dress series. In the last segment I'd futzed around with grading until the pattern fit my general dimensions. Today I'm going to talk about the fitting adjustments that were made to fit the pattern to my figure.

After trying on muslin #2 I had the following concerns - the dart had been dropped too low, the front neckline still felt a bit big, and there seemed to be too much extra length in the shoulder area. I also had figure out what skirt length to use.

In the end I made a ton of bodice muslins and quit at the point were my patience ran out.  You'll only see the final muslin since people under deadlines can't wait to favorable photo days. (There wasn't much difference between them anyway.)

Break down of all the final fitting adjustments. 
1. Raised the bust dart 1/2".
I'd previously dropped it 1.5 inches from the original position, so final dart location is 1" lower than the original.

2. Put a 3/4" hollow chest adjustment in front neckline.
In muslin #2 I felt neckline was still exposing a lot of my shoulder.  I'd picked a dress with sleeves so that I didn't have to mess around with special undergarments, but the neckline was exposing the whole bra strap.  Adding a hollow chest adjustment helped bring the neckline closer into the neck, giving me more bra coverage.  I didn't need to adjust the back neckline in anyway, probably because my forward shoulders need extra length in that area.

3. Removed 3/8" of grading in the shoulder area only. This change was made to both the front and back bodice.
McCall's 9572 has an elbow dart and it wasn't in the correct position. With the added grading the shoulder area felt a bit too big, even though the waist was perfect.  This makes sense because my shoulder/bust area is a size smaller than my waist/hip area.  Lucky for me a solution wasn't hard to figure out.
I'd put one of the grading lines right next to the side seam and decided it to use the underarm notch as a separation point.  I cut the notch deeper so that it connected with the grading line, breaking it into two parts. Then I removed 3/8" by moving upper part of the graded area back together. This operation left a small bump out under the notch area. To "true" the area I redrew the underarm curve.  Here's a picture of that adjustment before add the sloping shoulder adjustment mentioned in step 5.

4. Raised the kimono sleeve curve 1/2".
The ease in the upper part of the kimono sleeve was a bit too much for my modern tastes.  I decided to reduce that area by raising the curve of the kimono sleeve and narrowing the upper part of the arm. To do this I redrew the curve 1/2" higher than the original position and blended the underarm seam into the elbow area. (Didn't take a picture of this before cutting off the excess. Oops.)

5. Made a 1/2" sloping shoulder adjustment to sleeves.
After mocking up some of these changes I was still getting a horizontal fold across the back at the sleeve area.  (Super crappy photo below so you can get a general idea what I'm talking about.)
 Instagram was polled about this problem since I had no idea what was up. The general consensus was that it was excess fabric from my sloping shoulders.  I made a 1/2" adjustment for this using the "Fit for Real People" technique pictured below.
I'm only half convinced it made a real difference to the fit. Seems I need to work on more kimono sleeve fitting.

6. Shortened bodice by 1/4".
Took a scant quarter inch off that the bottom of the bodice. This length probably could have been left on because I ended up lining the bodice.

7. Shortened skirt by ????
OK I do know how much I shortened the skirt, it's just different in this muslin than it is in the final dress.  The muslin was shortened by 6" which turned out to be too short with the bias sucking back up.  On the final dress I shortened the skirt by 2".

Here's what all those adjustments look made up in the final muslin.

Front

Side

Back
There's still some wrinkling going on under the arm on the back. I may need a larger sloping shoulder adjustment then a 1/2".  On the other hand kimono sleeves without gussets are going to have more ease which equal wrinkles.  It's something I could have worked on some more, but decided that it wasn't worth the effort. Girl can't wear a muslin to her in-laws house on Christmas day.

Part 4 "The final dress" post will arrive when ever I get a photo opportunity. So far non rainy days have been few and far between and usually happen when I'm the sole parent around. Let's hope the next one collides with some toddler free time and maybe semi-warm temps.


Operation Xmas Dress Part 4 - The Real Deal

Yessss, it's finally time for the "sexy dress reveal" post.  Learning about fitting is all well and good, but it can't compare to finished garment eye candy. Warning, this post is overly photo heavy, cause reasons. Now let's get to it, shall we?

My first fabric choice for McCall's 9572 was green velvet, not crushed or panne, but regular velvet. However my internet searches did not turn up much in the way of regular velvet.  The only site that had something similar to what I was looking for was Michael Levine. Their emerald green velvet was lovely, but at 30 bucks a yard for 45" wide fabric, it was too rich for my budget. I consoled myself that sewing bias seams in velvet isn't something you want to do on a deadline.  Probably one of the smarter decisions of my life.

So right about the time I was admitting to myself that velvet wasn't going to happen, Sunni posted about wool crepe over on her blog. Ahhh wool crepe. Now that's a fabric that would drape well on the bias and wouldn't be a bear to sew.  I checked out what colors Sunni had in stock and low and behold she had the perfect color of hunter green.  The color pretty much sold me and 4 yards were soon on their way to me. People this color is GORGEOUS!  My camera can not fully capture the lovely depth it has. Wish I could mail you all swatches or something so that you could behold it with your own eyes. Mmmmm fabric crush.  
As you would expect, the wool crepe sewed up like a dream.  I did line the bodice portion of the dress since wool feels a little itchy when it is next to my skin. My "chiffon" petticoat took care of shielding my legs from the bottom half of the dress.

This pattern has cut on facings that are folded over and catch stitched to the seams. The directions suggested finishing the edges with bias binding and calling the insides done.  Personally this made me nervous since the entire neckline is on the bias. For my own peace of mind I fused the facing part of the bodice and then sewed twill tape right next to the area where the facings fold over.  Then I drafted a lining pattern by tracing the bodice pieces and removing most of the facings, leaving only a 5/8" seam allowance to attach it.
Some polyester leopard lining was chosen from the stash and I then found out why this pattern didn't tell you to line the bodice.  Ummm yeah, sewing 4 right angles is a complete pain in the ass. There was much ripping, clipping and cursing at past Heather. What the hell had she been thinking?  Only by some miracle did I get that lining in without major puckering at every point. Maybe the sewing goddess likes Christmas cookies.

The dress has a side zip for getting in and out of it.  I was going to do a regular invisible zip because me and invisible zips are best buds. My local JoAnn's had other plans for me since the only green invisible zip color they had in stock was olive green.  You had one job JoAnn's! Instead I had to buy a regular zip and hand pick it. BLARG. 
It did not go well...at all. Just getting the one side of the zipper in took me half a day.  Then I thought the zipper was done, unpicked it, and found that I hadn't hand stitched close enough to the tape and the entire seam allowance was free. GAHHHH!  So let's just all admit that we have different talents and hand picked zippers isn't mine.  However if you need an invisible zip sewn in with a perfect join in about 20 minutes then I'm the girl to call.
The rest of the insides are sergred and I finished the skirt with a small rolled hem as called for in the instructions.  Thank god for audio books to distract you from endless hems.

The final step for my Christmas dress was to make a self covered belt.  I lucked out and found a lady on Etsy who was destashing all of her of vintage belt kits. They were all added to my stash. Muhaaaa Mine!
This was my first time making a belt and it turned out OK for a beginner.  Wool crepe isn't the best fabric to start with since it does like to ravel. At least the worst looking ravely bits are all on the back side and can't be seen when the belt is worn. Putting, "more self covered belts" on the to do list for this year, so that I can get better at the skill.

Ahhh, so those are all the details on the Christmas Dress.  I was super pleased with how the whole thing turned out.  The dress was very comfortable to wear and I loved how the hunter green color looked with the red accessories.  It all went together just perfectly and I had that mental glow of a big project that turned out well.  

Thanks for sticking with me through this series that took longer than planned.  Now we can look forward to 2015 sewing. Hooray!

(Throwing in this less than great picture in because you should have at least one picture with a Christmas tree in the back. Look red petticoat!)

Stashes, Pledges and Whatnot

It's January so it's time for well meaning pledges which we may or may not follow through with. Woo hooo, zero blog accountability!

All jokes aside, I did make a stash busting pledge last year and did really well with it. Yes I still bought plenty of fabric, *cough* 154 yards *cough*.  However I sewed up/give away/trashed a lot more then that.  Thanks to my trusty excel spread sheet, I can confirm that my stash is now 97.5 yards lighter than it was at the beginning of the year.  Cue balloon drop and the donning of party hats. Froggie has cake for everyone on the side board and you can also admire the 2014 purchase of a Bernina 350 sewing machine.  (Big thanks to my immediate family who also contributed a good chunk of the sewing machine money.)


But now it's time to wipe the cake crumbs from my mouth and commit to another year of stash busting. Yes the stash is lighter, but somehow uses up the same amount of storage space.  At least I don't have to sit on the rubber maids bins to get them to lock anymore. They're "only" filled to the brim now. Baby steps, baby steps. Good news for me is that the Stash Busting Sew-a-long is in it's 3rd year and we have a great bunch of ladies in the facebook group. So without further ado here is my stash busting pledge for 2015

I, Heather Beckley, commit to stash busting enough fabric so that one of these containers can be removed from the floor of my bedroom.
This is not the main stash, it is the larger satellite stash. Which should not be confused with the smaller satellite stash down stairs next to the sewing machine.  I know, I know, big time hoarding. How many yards of fabric are in one of those bins?   Ummm lots?  Am I going to go measure the fabric lengths to find out?  God No! Instead I'm going to try and limit my purchases and sew up a bunch of stuff I've already got. Amorphous goals totally work people.

Froggie felt this whole plan needed his expert help, so he jumped in and asked me a few questions.
"What is your plan this month to sew up stash?" 
Right now I'm sewing all the garments that were planned in November/December. News flash Heather, there's no time to sew all those red/plaid/Christmas print garments in December. If you want to theme dress you've got to get beat your sewing elves into productivity right now! In December they run off to bake cookies. Stupid elf union.

"How are you going to limit purchasing pretty new fabric?"
Well thanks to the snazzy excel spread sheet,  I now know that my monthly sewing average is around 12 yards.  I'm going to try to buy less than what I can sew in a month. You should also change my paypal password when my back is turned.

"What types of fabric will you buy with abandon, conveniently forgetting your stash
busting pledge?"
Florals on black back grounds, anything with a fruit on it and probably any sort of red solid.  Snow leopard of course, cause that's a neutral and lobster prints, lots of lobsters. Oh and frog fabric, you are the top animal in the house.

"Sometimes that guy you married tells you that you have enough fabric. Does this help with stash busting?"
No, I then go spite buy fabric. I'm a horrible person.

"Will I be able to sleep in/eat cake on any fabric that arrives in the mail?"
You are more than welcome to make a frog nest in any fabric.  I would ask that you restrict cake eating to on top of the sewing patterns. I can't fault you about that cause I'm doing it too.

"How can I convince you to spend your fabric money on frog shoes instead?"
What do this shoes look like? Are they red with white polka dots? Can I also get a new pair of human sized shoes? If so we might have a deal.

"I think I hear the oven timer. Can we go eat some cake now?"
Yes, yes we can.

P.S. The Stash busting facebook group is a closed group only because we didn't want to clog up our main FB feeds.  We'll happily accept any new members who want to join the stash busting effort.

Sewing on and off the List

Every year I try to start off strong with my stash busting plans. Usually I'm in the mood for it and it's good to get the numbers down before my inevitable fall off the wagon in June. Warm weather makes me buy novelty prints, lots of them.

I admitted in the last post that my sewing plan for January was to sew all the things that were planned in December. When I say "planned" I really mean things that were floating around in my head. Things that I might have bought fabric for during Black Friday sales. Yeah, this girl is a horrible stash buster at the end of the year too.

The December but now January sewing list.
1. Red circle skirt
2. Black circle skirt
3. Another red pencil skirt
4. Plaid shirt dress
5. Plaid top of some kind

While I was hopped up turkey it seemed completely possible to sew all this stuff plus a Christmas dress. Yep, there needs to be an oversight committee for my sewing plans. "Excuse me Mrs. Beckley. Are you planning on never sleeping during the month of December?  Or maybe you are exploiting a small gang of furry frogs as sewing slaves?" Exploit?! They have all the baked goods they can eat!

Annnyway, back to those sewing plans.  Ugh plans. I hate real plans in writing because they suck all the joy from my sewing.  No one tells me what to do with my hobby, not even me! So after looking at the sewing list, I went off and cut out a fruit print Edith blouse.  Suck it list!
That was all well and good except the fruity cotton was a small vintage cut of fabric. There wasn't enough yardage for me to squeeze out self bias binding for the armholes. What to do, what to do?  Oh wait, I have black cotton poplin for that circle skirt. That would work great.....except I'll need to cut the skirt out first. Crap, guess I have to sew from that stupid list. (Cue sad horn)

I went the easy route and purchased New Look 6056 after seeing Margo sew it up.  Sure I could have messed around with maths and drafted myself one. Honestly I didn't have the head space for that after Christmas + germs. Take my 5 bucks and give me some mindless tracing.
I mindlessly traced the size 18, the one which corresponded to my waist circumference.  Surely I didn't need to worry about extra ease in a simple circle skirt. Who wears a circle skirt on their hips? Guess what, New Look thinks you should because I found 4" of ease needed to be removed. Lord have mercy.
I was a bit put out about having to rip apart what was supposed to be a quick project.  Then Froggie pointed out that I could have taken...oh 5 minutes....to measure the waist area on the pattern before starting.  Fair point.  I shall don the ribbons of Shame along with the ribbons of Laziness.

The one good thing about having to rip apart a garment, is that you might as well make some other changes. I decided to widen the waistband so it would look "nicer" if shirts are tucked in. Instead of cutting one waistband piece, I cut two and used one as a facing. The waistband still closes with skirt hooks on the side. This works fine but it's not my favorite finish.  If I remake this pattern I'd attach the zipper to the waistband as well.
Here's the full deets on the pattern...

Pattern
New Look 6056 (Now OOP, but still pretty easy to find)

Fabrics used
Kaufman Organic Cotton poplin from Fabric.com.  I bought this version because of it's wider width.

Pattern changes/alterations
1. Removed about 4" of ease from the side seams.
2. Cut the waistband out twice and sewed the upper edge at 3/8" seam allowance. This gives me a 1 3/4" wide waistband.
3. Did not use either suggested length from the pattern. Instead I cut the skirt to be a finished length of 28".

Confessions/Advice
- Don't be like me, measure the waist circumference before you begin!

- The skirt was cut cross grain to get the pattern to fit at the longer length. In this light weight fabric that worked fine.

- The waistband facing and the hem were all done on the machine.
- I'm wearing my Christmas petticoat under the skirt in these photos. The pattern looks equally well without it.

Husband Comment
He didn't have anything to say about the skirt, but this comment about the Edith blouse was too good not to share. "I like fruit on a black background. It's like your shirt is a dangerous jungle at night."

My Final Thoughts
Sewing a black circle skirt is a terrifically boring project. I coped by putting an audio book in my ears and machine finishing nearly everything on the garment. At least the cotton poplin was most cooperative with my time saving efforts.  That stuff don't get uppity notions about moving around after you pin it.
OK, I belly ached about a lot of things in this post, but do I like the finished garment?  Yes, it's great to have a black circle skirt in the closet. Too bad it couldn't magically appear in there without my involvement. What am I paying my slave frog work force for anyway?

On that note I'll leave you with the obligatory circle skirt swish photo. Yeahhhh petticoat swishing is awesome.
P.S. If you're new to the blog and want more details on Edith then here's the original review.

Odds and Ends

I'm knee deep in a coat sewing project and all sewing mojo has run off on a tropical vacation.  Not fair sewing mojo, you were supposed to take me with you.  That's what the stash of tropical print fabric is for!
I've been coping with my disappointment by marathoning murder mystery programs while knitting. The coat moodily glowers at me from the other room but I don't care. La la la laaaa, you don't exist coat, it's just me and my yarn and we are sooooo happy together. (Yarn is Madelinetosh DK in Flash dance and the pattern is a vintage Sidar, if you're wondering.)
It looks like it might be awhile until the sewjo returns to help me complete a project, so I'd better clear out some odds and ends in the meantime.

#1 - This year I'm going to participate in Vintage Pattern sewing pledge. My desire to sew more vintage patterns has been stoked by the Christmas dress project.  The vintage pattern stash is pretty small, so I'm setting the modest goal of sewing up 3 patterns this year. Here are two of my newest acquisitions that I'm pretty excited about.

#2 - We decided to do themes for the stashbusting sew-a-long a little differently this year.  Each month is going to be hosted by a different blog. In February Judy is having a big fabric contest complete with prizes. It sounds like she's set up a great bag of goodies, so you might want to stop on by to see if you want to sew along.  I'll be hosting March where the theme is "Using patterns you already have."

#3 - I'm the sewing superstar of the week over at Cut Out + Keep.  If you like reading my weird questions to interviews then check it it. ;)

Alright, I'm gonna stare at my coat lining now and wiggle my fingers around hoping it will attach it's self to the shell. Have a great week folks!

When Sewing Mojo is a No Go

Hello fellow lovers of fabric, I seem to be suffering from lengthy loss of my sewing mojo. It hightailed it out of here some time in November when my back was turned. Maybe it was offended at all my Black Friday clothing purchases, or just saw a chance to escape for warmer climates. We may never know.

In the meantime I've been keeping myself busy with the following things:

1. Casting on a crap load of yarn.
The cold weather seems to have sparked a desire to cover myself in yarn until I'm entangled in a yarny cocoon. I've been running amok on ravelry queuing up loads of sweater patterns and debating about how many should be cast on at once. My knitting mojo says, "How about all of them? That won't make you crazy or anything." Hey Mojo, I'm already crazy, does that make a difference? No? OK then, pass me those 40 yarn skeins.

2. Watching lots of TV
What goes together better than knitting stockinette and TV?  Nothing...unless you also add chocolate and wine to the equation.  Then you are having a proper Granny style party. "Ain't no party like a Granny style party, cause a Granny style party stops at 10 pm.....Granny needs her beauty sleep." 

I've watched "Death comes to Pemberley" which was very enjoyable and I'd recommend to anyone who enjoys period pieces.  Next I went on a large bender of crime dramas with "Broadchurch" and "The Killing.""Broadchurch was excellent and had me guessing the killer almost to the very end.  "The Killing" began strong, then started to drag and finally ended with me yelling about the writers being monkeys with type writers. After all the heavy fare I watched Lifetime's "Liz & Dick" and ironically enjoyed the horrible train wreck of a program that was. Oh Lohan, you better hope Liz Taylor's ghost doesn't rise from her grave intent on revenge. Though death by diamonds does sound kind of sexy.

3. Culling the fabric stash
After culling the fabric stash last year I thought there wouldn't be much more to remove.  Ummmm wrong. I've gotten to the point where my tastes have changed, which means some fabric has fallen out of favor. This led to some serious musing about the number of sewing plans vs time to sew. It so easy to wrack up a mental sewing list, harder to actually sew it.

I'm never going to be the one to say, "No more fabric purchases," because sometimes you need a pick me up or you run across something fantastic. However it crossed my mind that I should only purchase fabric I LOVE and not fabric that I only like. I've also reached the conclusion that what gets sewn and worn most often are cotton fabrics of both the knitted and woven variety. For years I've been buying all manner of fabrics because "I'm a real sewer and can sew all sorts of things." That's all well and good, but if you don't wear those other fabrics what's the point? Well the point probably was to Have All The Pretties. I might have to concede there are some flaws to that way of thinking. Flaws like when the fabric stash starts invading every room of your home and other family members start giving you the stink eye. It's like they want space for their hobbies, ungrateful wretches. ;)
(I did post some of my stash for sale on Etsy if you are not aware. Store name is FrogsStash.  Thank you to those of you that have already given some of my stuff new homes. I know you'll treat those fabric babies well.)

4. Eating my weight in chocolate. 
I'm sure you're aware that February is chocolate month and you must stuff your face with it at every opportunity. I've been fully embracing this concept and have been ransacking Trader Joe's and the local independent candy store. My current favorites are anything that involves chocolate and caramel creating a sinfully delicious union in my mouth. Come to Mamma!

5. Browsing Etsy for vintage sewing patterns......for hours
The part of my brain that wants to plan projects is still going strong.  I'm using vintage pledge a thinly veiled excuse to slightly pad the small vintage portion of the pattern stash. Maybe I'm genetically programmed to hoard things, but buying summer dress patterns helps me get through the winter.  I have no regrets about these new new additions. Bonus, the Advance one was only 5 bucks because the pencil skirt pieces were missing. No problem, I've got pencil skirt patterns a plenty.
So that's what's up in my neck of the woods. I'm hoping the sewing mojo will return soon because the lack of new clothing in my closet is really bumming me out. Where are those sewing birds and mice when you need them?

A Coat for my Petticoat

At long last a sewing FO post! Sewing Goddess be praised. I've been living with this coat as a UFO for what seems like two months.  It was more like one month, but there's nothing is worse than a giant project taking up your sewing space that refuses to finish it's self.   Where is my army of sewing frogs? What do I do all this baking for if they don't show up?

The problem did not lay in the pattern or even the fabric. The problem was me.  In the past I've gleefully cranked out several coats/jackets for the blog. Usually I find them to be an enjoyable project that has a great pay off.  This time the manic desire to cut into some coating just didn't come brimming up through my pores.  It could be that "sewing a coat" has been on the mental list so long that it turned into an obligation.  It could be that the Christmas dress was a big ass project and I wasn't really ready for another one. Or it could be that it's freaking cold in my sewing area and I'd rather hide in my bedroom with some knitting needles.  Bring me a heating pad and a pie!
Now you might be asking, "Heather, if you didn't want to sew a coat, then why did you bully yourself into doing it?" Good question and I've got three perfectly valid reasons.  Number 1 There is a lot of wool coating in the stash taking up tons of room.  Number 2 - I didn't feel like freezing my butt off outside while taking pictures of summer dresses.  Number 3 - I needed a coat that had a wide enough skirt to fit my petticoat under it......like you do.   OK, I realize that the last sentence is a bit absurd and even Past Heather would be going, "Petticoat What?" Let's just say this whole "retro dressing" thing is a slippery slope and soon you find yourself buying petticoats and hair flowers and LOVING IT. My petticoat gets worn semi-regularly and thus I needed a coat where it didn't awkwardly stick out the back. Nothing ruins your look faster then a "tooth paste squeezing out of the tube" look around your knees.
With the criteria "can fit a petticoat under it" only one pattern jumped into my mind.  Gertie's kimono sleeved, full skirted coat pattern, better known as Butterick 5824. Now that baby has petticoat room to spare. Heck I could smuggle drowsy Dashshounds under there and no one would be the wiser. "No your coat is barking. No yours!. Yip, yip, yip."
Ahem, where were we? Ah yes, coat planning. I've always liked the look of B5824, but it does need a whole lot of fabric. Did my stash have a length of coating long enough? I had to put my minions to work finding out. "Ohhhh Froggie, break out the tape measure cause you've got some measuring to do. Chop, chop." Turns out most of my coating lengths are in the 3-4 yard range, way too short for the pattern. I was about to abandon B5824 when, huzzah, the cobalt blue wool turned out to be 5 yards long. That's still a half yard short of the requirements, but with a little tweaking the pattern just might fit. I did a test layout and found that 5 yards would work fine if the coat was 2" shorter.

The original plan was to get this coat done in January for both Jungle January and the Gertie pattern contest McCall's was having. I'm sure that could have happened if I'd sewed the coat instead of doing a bunch of avoidance knitting. "Laa, Laa, Laa, what coat?  There is only yarn." Oh well, knowing you'll like a finished garment doesn't always make for speedy sewing. Hopefully Miz P. will forgive me for missing the wonderful Jungle January if she gets a flash of the lining.  Put on your sunglasses because snow leopard lining springs eternal.
As usual I've put all my fitting tweaks, scandalous confessions and husband input below. So read on for more coat goodness.

Pattern
Butterick 5824. I used a combo of sizes 16/18, but could have easily cut a straight size 16.

Fabrics used
Wool flannel coating from Gorgeous fabrics.
Snow leopard lining also from Gorgeous fabrics

Pattern changes/alterations
1. Made the same 1/2" sloping shoulder adjustment to the kimono sleeve as I did to my Christmas dress.

2. Shortened the bodice length by 3/8".

3. Increased the back dart intake to 2 1/2".

4. Did an "on the fly" adjustment of taking in the waist at the side seams about an 1" total.

5. Instead of using bound buttonholes as the closure, I used large snaps so that there was nothing to get in the way of a belt. Also I hate sewing bound buttonholes.

6. Added some thread belt loops to the side seams.

7. Pieced the pocket so that the self fabric would peak out of the seam and not the lining.


8. Reduced the length of the coat by 2". I did not use the lengthen/shorten line. Instead the length was taken off the bottom of the hem to also reduce the hem sweep a bit.

Confessions/Advice
- I did check out the sew-a-long for this pattern on Gertie's blog. Most of the coat's construction was straight forward to me so I didn't need additional hand holding. However I did appreciate some of the extra finishing tips she'd posted. For example I'd never basted down the edges of a coat and then steamed them so that they roll in the correct direction. That technique worked well and I think it makes the coat look a little more professional.

- Because of the weight of the skirt pulling on the waist, you could almost go down a waist size on the pattern.  Even with my on the fly waist alteration, the coat is still overly roomy in that location.

- I like the look of this coat with a belt on my figure. The belt gives me some more waist definition and detracts from the fact that the front closure is bulky in this fabric.

- The instructions to fuse the entire hem were followed even though it was a total pain in the ass. It probably doesn't matter in wool this thick.....but then I'm not a coat expert.

Husband Comment
"You look like cookie monster. Just kidding, it's elegant.....for cookie exchange parties."

My Final Thoughts
While I might not have been in the mood to sew a coat, I sure do love wearing it. It's all "wintertime princess" with serious twirl factor. Pretty sure you could throw this over a bath robe and strangers on the street would still ask why you are dressed up. "Because I made this coat. See, SEE!" Then they back away slowly. That's good cause I need room to twirl.

P.S.  A big thanks to everyone who nominated/voted for my blog over on Madalynne's best sewing blog series. I almost feel sheepish about getting an "award" for inheriting my father's need to be productive at all times. Still gonna put the button up though. ;)
Viewing all 231 articles
Browse latest View live